
You set your oven to 375°F, wait for the chime, and slide in dinner—only to realize an hour later that the center is still raw and the internal thermometer barely reads 300°F. When an oven fails to hit its target heat, dinner plans grind to a halt right as seasonal baking begins. Fortunately, you can diagnose and resolve the most common temperature drop causes with a few straightforward checks.
Before handling any interior components, always prioritize safety. Disconnect the oven from electrical power at the wall outlet or flip the dedicated dual-pole breaker in your electrical service panel. If you are working near gas supply lines on a range, turn off the manual gas shutoff valve first.
Test the Temperature Sensor Probe
Most modern ovens rely on an internal resistance temperature detector (RTD) sensor probe, typically located in the upper back corner of the cavity. Over years of high-heat cycles and grease splatters, the sensor can drift out of resistance tolerance, sending incorrect temperature data to the control board.
- Locate the thin metal probe projecting into the top rear of the oven cavity.
- Ensure the probe is not bent, coated in baked-on grease, or touching the interior oven wall.
- Disconnect power to the unit, remove the mounting screws holding the probe bracket to the back wall, and gently pull the wire harness through.
- Disconnect the plastic terminal plug.
- Set a digital multimeter to the ohms (Ω) setting. At standard room temperature (around 70°F), a standard RTD sensor should read approximately 1,080 to 1,100 ohms.
If your multimeter shows no continuity or a reading substantially different from your manufacturer's room-temperature spec, replace the probe. A replacement sensor typically costs between $20 and $60, making this one of the most cost-effective repairs you can perform.
Inspect the Oven Door Gasket for Heat Leaks
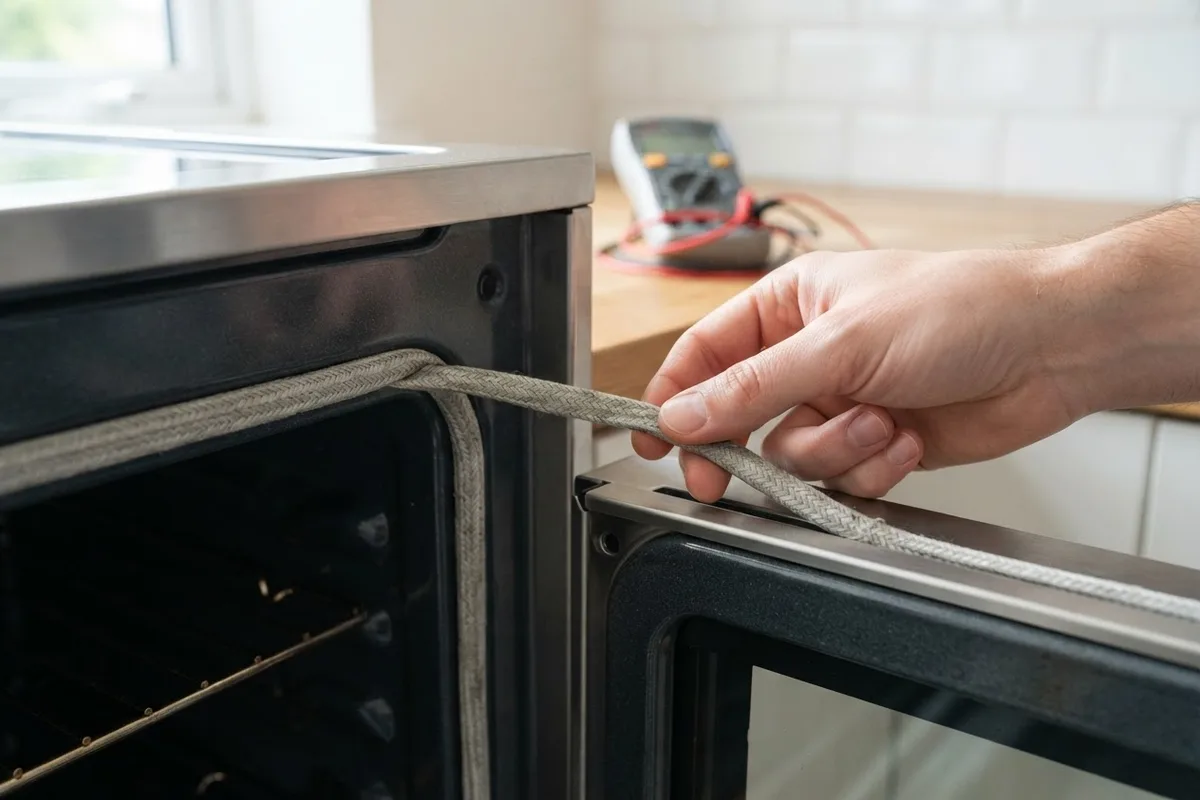
The fiberglass or silicone gasket lining your oven door or face frame keeps intense heat locked inside the cooking cavity. If this seal becomes brittle, torn, or flattened, thermal energy escapes continuously into your kitchen, preventing the oven cavity from ever matching the set point.
- Let the oven cool completely to room temperature.
- Run your fingers along the perimeter of the gasket, checking for hardened sections, tears, gouges, or missing mounting clips.
- Perform the dollar-bill test: place a dollar bill across the seal, close the door completely, and pull. You should feel firm resistance. If the bill slides out effortlessly, the gasket is not compressing properly.
- Clean away any sticky grease or debris from both the seal and the mating oven frame using warm water and mild dish soap, as buildup can prevent a tight closure.
If the rubber or braided fiberglass is cracked or sagging, unclip it from the retention holes and press a manufacturer-matched replacement into place.
Check for a Failing Gas Oven Igniter
In a gas oven, an igniter does more than create an ignition spark; it acts as an electrical safety valve controller. The igniter draws electrical current, glows white-hot, and opens the safety valve once it reaches roughly 3.2 to 3.6 amps. Over time, the igniter weakens with age.
- Turn off the kitchen lights, set the oven to bake at 350°F, and peer through the bottom vent or floor panel.
- Watch the igniter glow. A healthy igniter should ignite the gas burner within 30 to 90 seconds.
- If the igniter glows a dull red or orange rather than a radiant yellow-white, or takes longer than two minutes to open the gas valve, its resistance has increased.
- A weak igniter may open the valve during the initial preheat, but fail to re-ignite consistently during the maintenance cycles, causing the cavity temperature to plummet.
Replacing a weak igniter generally restores accurate temperature regulation. If you ever smell raw gas, shut off the supply valve immediately and air out the home before continuing.
Examine the Hidden Bake or Broil Element
Electric ovens utilize both the bake element (at the bottom) and the broil element (at the top) to reach and maintain steady heat. If the bake element has partially failed, or if an oven with a hidden under-floor element experiences wiring degradation, the top broil element may attempt to carry the entire heating load alone.
- Visually inspect visible heating coils for blistered spots, thinning metal, ash deposits, or visible breaks.
- If the lower element is hidden beneath a metal floor panel, listen for normal cycling clicks or remove the access panel screws (with power disconnected) to reveal the coil.
- Disconnect power at the breaker panel.
- Detach the spade wire leads from the element terminals.
- Use your multimeter to check continuity across the element terminals. A functional heating element typically registers between 15 and 45 ohms.
An infinite resistance reading (open circuit) confirms the element has burned out internally and requires replacement.
Recalibrate the Electronic Temperature Control
Sometimes all mechanical and heating components function properly, but the appliance's internal software offset has drifted. Manufacturers design digital oven control boards with an adjustable calibration offset, allowing homeowners to shift the actual operating baseline by up to 35°F higher or lower.
- Place a reliable, standalone analog or digital dial oven thermometer on the center rack.
- Set the oven to 350°F and allow it to preheat. Let it cycle for at least 45 minutes to establish a stable thermal rhythm.
- Note the thermometer reading at the high point and low point across three complete heating cycles to determine the true average temperature.
- If the true average sits 15°F to 30°F below your set point, consult your user manual for the calibration key sequence (often holding down the "Bake" or "Temp" button for 5 to 10 seconds until "00" or "CAL" appears).
- Use the arrow keys or keypad to add a positive offset (such as +15°F) to align the electronics with actual baking temperatures.
If your control panel shows erratic characters or does not store temperature settings, explore our guide on why your oven touchpad is not responding or review steps for when your oven is beeping unexpectedly.
Troubleshooting Oven Temperature Issues
Use this quick-reference table to match your oven's symptoms to the most probable culprit and necessary action:
| Symptom | Most Likely Cause | Typical Action Required |
|---|---|---|
| Cavity stays 50°F+ below set point | Defective RTD sensor probe | Test resistance with multimeter; replace probe |
| Bottom crust undercooked, top browned | Burned out lower bake element | Inspect coil for breaks; replace bake element |
| Gas burner fails to reignite midway | Weak silicon carbide igniter | Measure amp draw; replace gas igniter |
| Exterior cabinet and knobs feel scorching | Flattened door gasket | Conduct paper test; replace perimeter gasket |
| Cavity is consistently 20°F cool | Software calibration drift | Adjust control board temperature offset |
| Oven trips breaker when heating | Grounded heating element wire | Check wire harness; inspect internal insulation |
When to Call a Pro
While swapping a visible baking element or adjusting a software offset makes a manageable weekend task, certain oven problems carry safety risks. If your diagnosis points to a damaged main control board relay, degraded wiring behind structural metal panels, or recurring gas ignition delays, it is best to step back. Working on gas lines, high-voltage dual-pole circuits, or internal control boards requires specialized testing gear.
Professional oven repair generally ranges from $150 to $400 for standard part replacements, though exact costs vary by area and model complexity. When complex electrical or fuel line issues arise, True Appliance Repair can match you with an independent local appliance repair pro to restore safe, accurate heating to your kitchen.
FAQ
Why does my oven take over 30 minutes to reach temperature?
An unusually long preheat often signals that only one of your two heating elements is firing. If the lower bake element fails in an electric model, the broiler element will attempt to warm the entire cavity alone, doubling or tripling your preheat time.
How accurate are built-in oven temperature displays?
The electronic display reflects the target temperature setting or an algorithm-based estimate, not necessarily real-time cavity heat. Internal temperatures naturally fluctuate 20°F to 30°F above and below the target as the thermostat cycles elements on and off.
Can a dirty oven affect baking temperature?
Yes. Thick layers of carbonized grease across the heating elements, sensor probe, or floor can insulate heat sources and disrupt natural airflow. Keeping the cavity clean helps radiant heat transfer evenly throughout your cookware.
How long should an oven temperature sensor last?
Most oven temperature sensor probes last between 8 and 15 years. However, frequent high-temperature self-cleaning cycles or physical impacts from heavy baking dishes can cause the probe to fail earlier.