
Opening the freezer for a cold drink only to find a bone-dry ice bin is an instant headache, especially when hosting family or preparing for a busy week. Most of the time, a refrigerator ice maker stops producing cubes because of a simple airflow issue, a tripped sensor arm, or a restricted water supply rather than a dead motor. Walk through these six safe, practical checks to diagnose the culprit and get your ice production back on track.
Safety First: Before inspecting internal components, clearing ice jams, or pulling your appliance away from the wall, always unplug the refrigerator from the electrical outlet and shut off the main water supply valve behind the unit.
1. Check the Ice Maker Bail Arm and Power Switch
Before reaching for any tools, make sure the ice maker hasn't simply been turned off by accident. It is remarkably easy for a tall frozen pizza box or an overstuffed bag of vegetables to bump the shutoff mechanism while you are loading groceries.
- Locate the control: Look inside the ice bin area. Older or basic models use a wire lever called a bail arm, while newer models have an on/off toggle switch or a digital control panel button.
- Lower the wire bail arm: If your unit has a metal feeler arm, gently push it down. When pushed up into the locked position, it pauses ice production because it thinks the bin is full.
- Clear surrounding items: Move any frozen food bags away from the top of the ice bin so the arm or infrared sensor beam has an unobstructed path.
- Press the reset button: Many modern ice makers have a small test or reset button on the side or bottom of the module. Press and hold it for three to five seconds to force a test cycle.
2. Lower the Freezer Temperature Below 5°F
An ice maker will not cycle if the freezer compartment is too warm. Most built-in ice modules have an internal thermostat that refuses to open the water valve or eject cubes until the mold temperature drops low enough. Even if your frozen food feels solid, the freezer might be hovering around 10°F or 15°F—too warm for efficient ice harvesting.
- Place an appliance thermometer inside: Put a standalone thermometer in the center of the freezer for a few hours rather than relying solely on the door display.
- Adjust the dial to 0°F: Set your freezer temperature between 0°F and 5°F (-18°C to -15°C).
- Clear the air vents: Ensure food packages are not blocking the cold air vents at the back of the freezer, which prevents air from reaching the ice mold.
- Check for frost buildup: If the back wall is covered in heavy snow, you may need to follow our guide on how to defrost a freezer fast so cold air can circulate properly again.
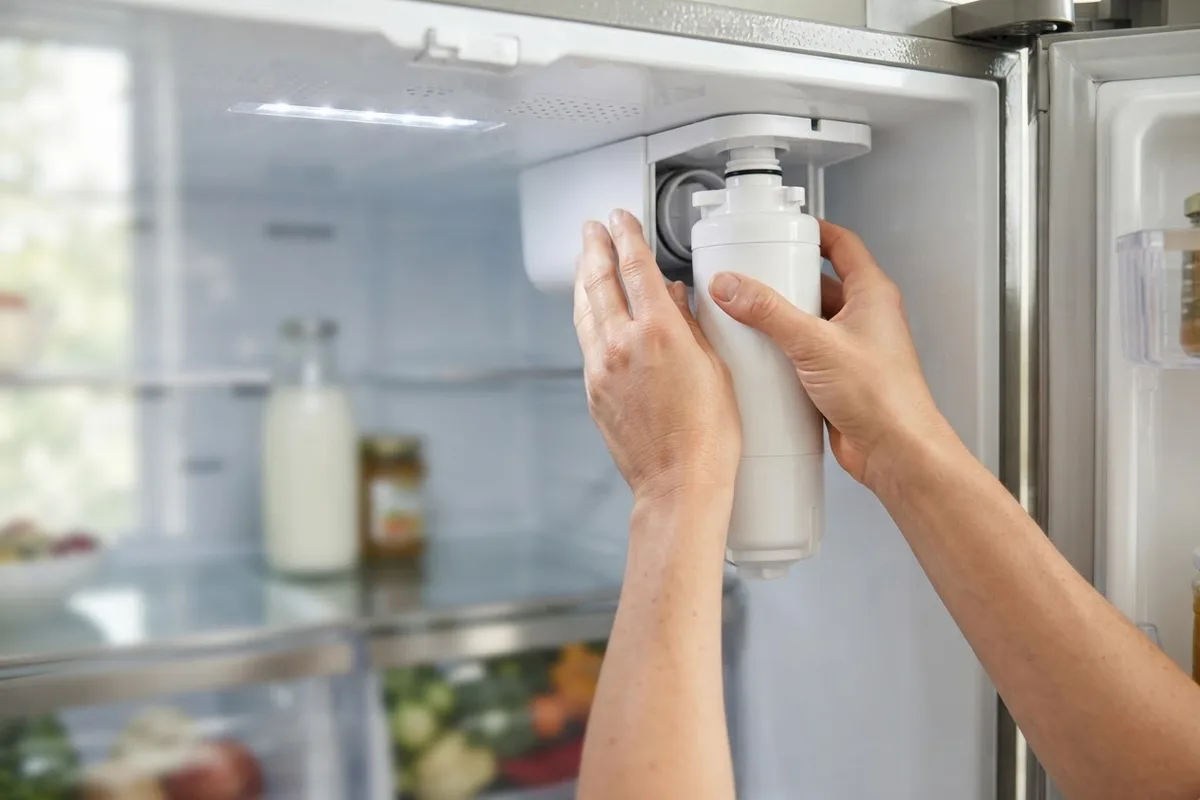
3. Replace a Clogged Refrigerator Water Filter
When your water filter gets packed with sediment and mineral scale, water pressure drops dramatically. If the pressure falls too low, the water inlet valve cannot send enough water up the back of the fridge to fill the ice tray, resulting in tiny, hollow cubes or no ice at all.
- Check the age of your filter: Standard refrigerator water filters need to be changed every six months, or sooner if your home has hard water.
- Locate and remove the old cartridge: Depending on your model, the filter is usually in the upper right corner of the fridge ceiling, inside the base grille, or tucked next to the crisper drawers. Twist it counterclockwise or push the release button to pull it out.
- Install a fresh filter: Remove the protective cap from the new filter, line up the arrows, and twist or push it firmly into place until it locks.
- Flush the water line: Run about two gallons of water through the door dispenser to purge trapped air bubbles and carbon dust before waiting for the first batch of ice.
4. Thaw a Frozen Water Fill Tube
The small plastic or rubber spout that pours water directly into the back of the ice maker mold is called the fill tube. If your water pressure is slightly low or the inlet valve has a tiny drip, water can freeze solid inside the tip of this tube, creating an ice dam that blocks future refills.
- Unplug the refrigerator: Disconnect the power cord to stay safe while working inside the freezer.
- Remove the ice bin: Lift the plastic ice bucket out of the way so you can clearly see the back of the ice maker assembly.
- Inspect the fill spout: Look for a small black or white tube angled into the back cup of the ice mold. Feel the tip with your finger or a wooden craft stick to check for solid ice.
- Melt the blockage safely: Use a turkey baster filled with warm water or a hair dryer on the low setting held several inches away to gently thaw the ice plug. Never use a sharp knife, screwdriver, or high heat, which will warp the plastic liner.
- Wipe dry and restore power: Dry any melted water droplets with a towel so they do not immediately refreeze, then plug the fridge back in.
5. Straighten a Kinked Water Supply Line
Sometimes the problem isn't inside the freezer at all—it is hidden behind the appliance. After cleaning behind the fridge or pushing it back against the wall too far, the flexible copper or braided supply tubing can pinch shut.
- Pull the fridge out carefully: Roll the refrigerator straight out from the wall a few feet, taking care not to scuff your flooring.
- Inspect the water line: Check the narrow tubing running from your kitchen wall or floor valve to the back of the fridge.
- Fix any sharp bends: If you spot a kink in a plastic line, straighten it out so water can flow freely. If a copper line is crimped flat, shut off the water valve and replace the damaged section with a braided stainless steel supply line.
- Verify the shutoff valve is open: Make sure the saddle valve or quarter-turn shutoff valve under the sink or behind the fridge wasn't bumped closed.
6. Inspect the Water Inlet Valve for Sediment
The water inlet valve is an electrically controlled gate at the bottom rear of the refrigerator that opens for a few seconds to send water to the ice maker. Over time, tiny mineral flakes from your household plumbing can clog the valve's tiny mesh screen, or the solenoid coil can fail.
- Unplug the appliance and turn off the water: Ensure both electricity and water are completely disconnected before opening the back panel.
- Remove the lower access cover: Use a nut driver or screwdriver to take off the cardboard or metal access panel at the bottom back of the fridge.
- Check the inlet screen: Place a towel down to catch drips, unscrew the main water supply nut from the inlet valve, and peek inside the valve port.
- Rinse away debris: If the tiny mesh screen is crusted with sand or rust particles, gently brush it clean or rinse it out, then reconnect the line tightly and check for leaks when you turn the water back on.
Quick Troubleshooting Guide: Ice Maker Symptoms & Costs
Use this table to quickly match what your refrigerator is doing to the most likely cause and typical US repair cost ranges (actual prices vary by region and appliance model).
| Symptom | Most Likely Cause | DIY or Pro? | Typical Cost Range (Varies by Area/Model) |
|---|---|---|---|
| No ice, water dispenser works slowly | Clogged water filter | Easy DIY | $20 – $60 (filter replacement) |
| Ice maker clicks, no water enters mold | Frozen fill tube or kinked line | Easy DIY | $0 – $25 |
| Ice cubes are small, hollow, or clumped | Low water pressure or failing inlet valve | DIY / Pro | $120 – $250 (pro valve swap) |
| Freezer feels soft, zero ice production | Dirty condenser coils or cooling failure | DIY / Pro | $150 – $400+ |
| Water fills mold, but cubes never eject | Failed ice maker module assembly | Pro Recommended | $200 – $375 |
When to Call a Pro
If you have thawed the fill tube, installed a fresh water filter, and verified that the freezer sits squarely at 0°F, the mechanical gear inside the ice maker assembly or the electrical solenoid on the water inlet valve has likely worn out. You should also stop and call a professional if you notice the refrigerator compartment warming up alongside the freezer, hear persistent clicking from the compressor, or spot water pooling under the cabinetry. If your unit is older and showing multiple issues, check our guide on 7 signs your refrigerator is dying to weigh your options.
Never attempt sealed-system refrigerant work or high-voltage control board repairs yourself. When you need a reliable hand with a stubborn module or valve replacement, True Appliance Repair can match you with an experienced local specialist for fast refrigerator repair.
FAQ
How long does it take a refrigerator to make ice after resetting?
Once you reset the ice maker or install a new filter, it takes most refrigerators between 3 and 6 hours to freeze and drop the first batch of 8 to 10 cubes. It typically takes a full 24 hours for an ice maker to completely fill an empty storage bin.
Why is my ice maker not working when the water dispenser still works?
The water dispenser and ice maker often use separate solenoids on the water inlet valve and separate water lines running through the appliance. If the water dispenser flows strongly, your main supply and filter are fine, meaning the issue is isolated to a frozen ice maker fill tube, a bad ice maker module, or the ice side of the inlet valve.
How do I force my refrigerator ice maker to cycle?
Look for a small square button on the side, front, or bottom of the ice maker head inside the freezer. Press and hold that button for about 5 seconds until you hear the harvest arms begin to turn or hear water humming for a few seconds. Always allow 24 hours after a manual reset to see if automatic cycling resumes.
Can a dirty condenser coil stop the ice maker from working?
Yes. When dust and pet hair coat the condenser coils underneath or behind the fridge, the appliance struggles to release heat and the freezer temperature slowly creeps up. Even a five-degree rise in freezer temperature can pause automatic ice production to prevent the unit from overworking.