
Opening your fridge to find warm air instead of a crisp chill is an immediate headache. Milk spoils, produce turns soft, and food safety becomes an urgent issue. When your refrigerator stops cooling properly, the problem usually stems from restricted airflow, dirty components, or failed cooling parts rather than a completely dead unit.
Before throwing away groceries or assuming you need a costly replacement, several fast DIY steps can identify and fix the underlying issue. Always put safety first: unplug the refrigerator from the wall outlet and disconnect any water lines before performing hands-on inspections or cleaning tasks. Here are six reliable fixes to get your appliance cooling properly again.
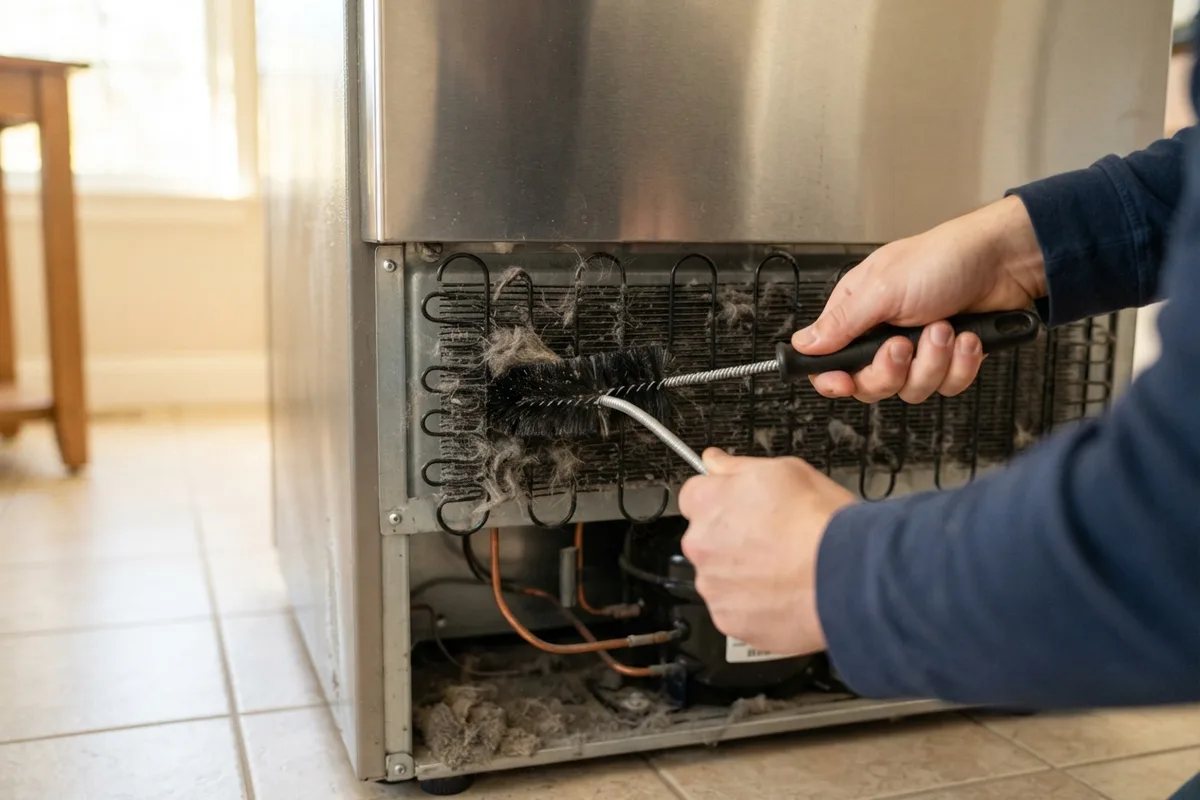
Clean Dust and Lint off Condenser Coils
Condenser coils release the heat removed from inside your cabinet. When these coils accumulate a thick layer of dust, pet hair, and floor grime, heat remains trapped inside the system, forcing the compressor to work extra hard while internal temperatures steadily climb.
- Unplug the unit and pull it gently away from the wall to access the back panel or remove the front bottom toe kick grille.
- Locate the dark metal coils, which resemble a grid or heavy wire spiral underneath or behind the appliance.
- Vacuum loose dust using a long brush attachment or dedicated coil brush.
- Wipe away stubborn grime with a dry microfiber cloth, taking care not to bend thin aluminum fins.
- Vacuum the surrounding floor area and plug the refrigerator back into power.
Routine cleaning every six months improves cooling performance and reduces energy consumption. If your home has shedding pets, checking these coils quarterly is ideal—especially when tackling a late-summer appliance maintenance checklist.
Reset Temperature Controls and Internal Airflow Vents
It is surprisingly easy to accidentally nudge temperature dials when loading bulky grocery items. Similarly, packing tall boxes or wide bowls directly in front of internal air vents chokes cold air distribution throughout the fresh food compartment.
- Locate the internal control panel or dial inside the fresh food section.
- Confirm the set point is between 37°F and 40°F (3°C to 4°C). Freezers should sit at 0°F (-18°C).
- Reorganize shelf items to keep at least two inches of clear space around the air vents located along the back wall.
- Avoid overpacking shelves; air must circulate freely between containers to maintain uniform cold temperatures.
- Wait 12 to 24 hours after adjusting controls for internal temperatures to stabilize fully.
If you notice temperatures swinging wildly in the opposite direction after adjustments, review our guide on why your refrigerator might freeze food instead.
Test and Clean the Rubber Door Gaskets
Flexible rubber gaskets seal cool air inside and block warm room air from seeping into cabinet compartments. Over time, spilled juice, crumb buildup, or cracked rubber breaks this magnetic seal, allowing humid air to enter and warm up your food.
- Perform the dollar bill test: Insert a crisp bill between the door seal and cabinet frame, then close the door. Pull the bill outward gently. If it slips out effortlessly with zero resistance, your door gasket is not sealing tightly.
- Clean the flexible seal: Wipe around the entire perimeter with warm water and mild dish soap. Remove trapped debris inside the rubber folds using a soft sponge.
- Restore flexible rubber: Apply a thin layer of petroleum jelly along the hinge side of the gasket to keep rubber pliable and prevent drag.
- Replace damaged seals: If you spot torn, warped, or cracked sections, order a direct manufacturer replacement seal. Warm the new gasket gently with a hairdryer on low heat to smooth out shipping creases before snapping it into the door track.
Inspect and Unblock the Evaporator Fan
The evaporator fan pulls air across cold cooling coils inside the freezer section and pushes it into the fresh food area. If this fan stops spinning, the freezer may stay cold while the main refrigerator compartment grows progressively warmer.
- Unplug the unit and open the freezer compartment door.
- Listen closely or inspect the back freezer panel where the fan grill sits.
- If you hear squeal, rattling, or complete silence while the compressor runs, open the back freezer panel using a screwdriver.
- Inspect the plastic fan blades for ice obstructions or physical debris.
- Spin the fan blade manually with your finger. If it feels stiff or resists movement, the fan motor bearings have likely worn out and require replacement.
- Clear away light frost accumulations using a hair dryer on medium heat, ensuring all melted water drains into the drain hole below.
Defrost Ice-Clogged Evaporator Coils
A faulty automatic defrost heater, defrost thermostat, or timer allows frost to build up heavily over the evaporator coils inside the freezer panel. Once ice completely encases these coils, airflow stops entirely, causing the refrigerator section to warm up rapidly.
- Disconnect electrical power to the appliance.
- Transfer perishable food into insulated coolers with ice packs.
- Open freezer and refrigerator doors completely, placing thick towels along the floor underneath to catch dripping water.
- Allow the unit to manual defrost for a full 24 hours until all internal ice melts away completely.
- Clean up standing water inside the cabinet and dry all surfaces thoroughly.
- Plug the appliance back in and monitor cooling for 48 hours.
If ice returns within a week or two after a manual defrost, an electrical component within the automatic defrost circuit has failed and needs testing with a multimeter.
Clean and Test the Condenser Fan Assembly
Most modern frost-free refrigerators feature a condenser fan located near the compressor underneath the rear cabinet. This fan cools the compressor and draws air across external coils. If the fan stalls due to hair wrap or mechanical failure, the compressor overheats and shuts off defensively.
- Pull the appliance away from the wall and unplug the power cord.
- Remove the lower rear access cover using a nut driver or Phillips screwdriver.
- Locate the small fan motor mounted next to the rounded black compressor tank.
- Use a soft brush and vacuum to remove dust, lint, and pet hair caught around fan blades and motor housing.
- Attempt to turn the blades gently by hand; remove trapped debris if the fan binds.
- Plug the power cord back in briefly while keeping hands clear of wiring. If the compressor hums but the condenser fan fails to rotate, the fan motor needs replacement.
| Issue / Cause | Symptoms | Primary DIY Fix | Estimated Repair Difficulty |
|---|---|---|---|
| Dirty Condenser Coils | Fridge warm, compressor running hot | Vacuum dust & debris from coils | Easy |
| Blocked Air Vents | Warm spots on upper/lower shelves | Reorganize food items away from vents | Very Easy |
| Failing Door Gasket | Condensation on walls, warm interior | Clean seal or perform dollar bill test | Easy |
| Frost-Locked Evaporator | Freezer iced up, main fridge warm | Perform 24-hour manual defrost | Moderate |
| Failed Evaporator Fan | Freezer cold, main fridge warm | Inspect fan blades & replace motor | Moderate |
| Stalled Condenser Fan | Cabinet warm, clicking compressor | Clear debris from rear lower fan | Moderate |
When to Call a Pro
While simple maintenance and basic part swapping resolve many cooling issues, complex electrical or refrigerant failures demand specialist equipment. You should stop DIY troubleshooting and consult a qualified technician if you encounter:
- Sealed system leaks: Punctured tubing or loss of refrigerant requires specialized recovery tools and brazing skills.
- Compressor failure: A compressor that clicks repeatedly, hums without starting, or runs boiling hot without cooling indicates major mechanical wear. Compressor replacement costs typically range between $350 and $800, depending on parts and local labor rates.
- Main control board issues: Burnt circuit components or erratic electrical glitches require diagnostic testing beyond basic home tools.
- Gas lines or internal wiring: Never attempt electrical panel rewiring or gas fitting work yourself.
When basic steps do not resolve cooling issues, True Appliance Repair can connect you with a qualified local specialist to diagnose and fix complex refrigeration problems quickly. If you need help with other home appliances, our network also assists with washer and dryer repair and dishwasher repair.
FAQ
How long does a refrigerator take to cool down after being plugged back in?
After being unplugged or defrosted, a standard home refrigerator typically takes between 12 and 24 hours to reach its target operating temperature (37°F to 40°F). Avoid placing large quantities of room-temperature food inside during the first few hours to speed up cooling.
Why is my freezer cold but my refrigerator warm?
This classic symptom usually points to restricted airflow between compartments. Common culprits include a failed evaporator fan, air vents blocked by food items, or evaporator coils encrusted with thick frost due to a failure in the automatic defrost system.
How much does it cost to fix a refrigerator that is not cooling?
Minor DIY repairs like replacing a door seal or evaporator fan motor usually cost between $30 and $150 in parts. Professional repairs for electronic boards, fan motors, or thermistors generally run from $150 to $400, while compressor replacements can range from $350 to $800+ depending on your model and region.
Should I repair or replace a warm refrigerator?
If your refrigerator is under 8 years old and the repair cost is less than half the price of a new unit, repair is usually the most economical choice. However, if an older unit requires major sealed-system or compressor work, upgrading to a modern energy-efficient model is often smarter long-term.