
When you press your glass against the dispenser paddle and nothing comes out, it instantly disrupts your kitchen routine. Refrigerator water dispensers rely on a simple network of valves, tubes, switches, and filters. When one of these components clogs, freezes, or fails, water flow stops completely or slows to an annoying trickle.
Fortunately, you do not always need a technician to solve dispenser issues. By following a structured troubleshooting process, most homeowners can pinpoint the problem and restore fresh, cold water in under an hour. Here are five practical DIY fixes to get your refrigerator water dispenser working again.
1. Replace a Clogged Refrigerator Water Filter
A clogged water filter is the single most common reason a dispenser stops delivering water. Over time, sediment, minerals, and municipal water additives accumulate inside the filter cartridge. As microscopic debris fills the carbon core, water pressure drops dramatically until the valve can no longer push water through the dispenser tip.
If your water flow has gradually slowed down over several weeks or if your filter hasn't been replaced in over six months, the cartridge is almost certainly blocked. Many modern refrigerators also feature an automatic bypass valve that shuts off water flow entirely if the filter housing detects extreme backpressure.
To fix this issue:
- Turn off the ice maker switch inside the freezer.
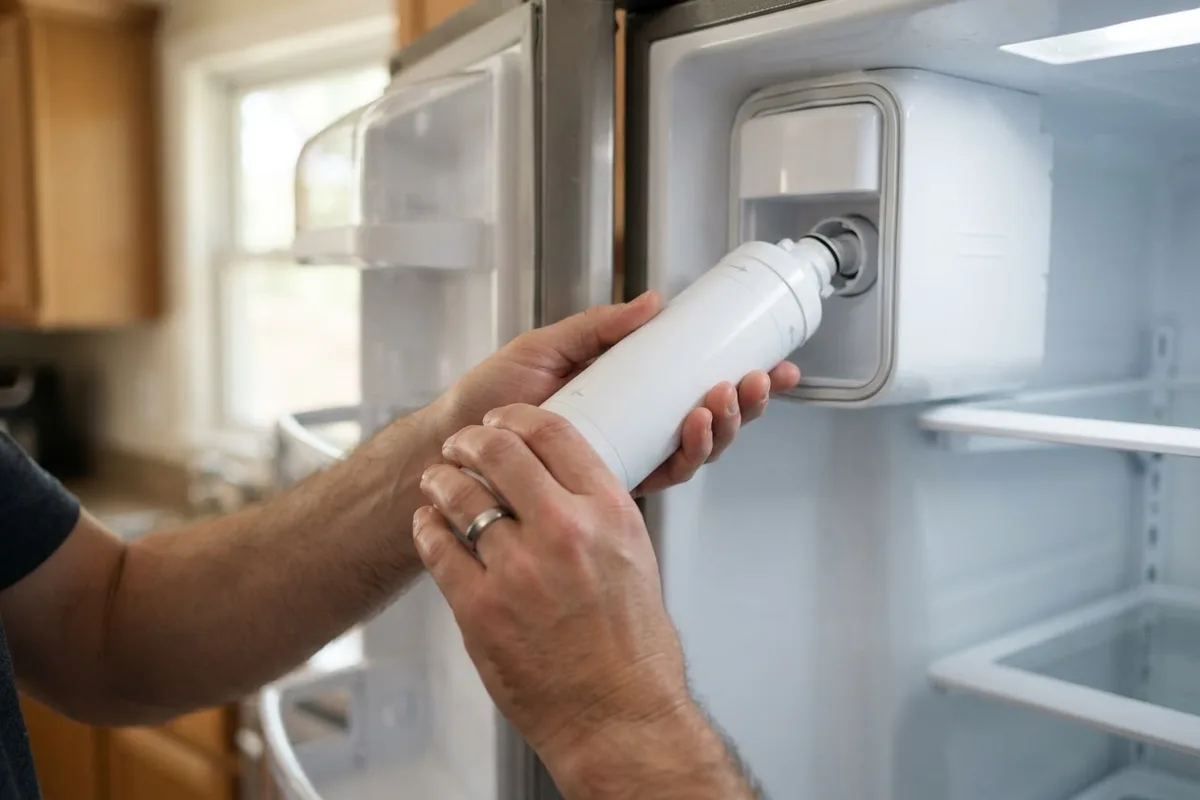
- Locate the water filter housing, typically found in the upper-right corner of the fresh food compartment or inside the bottom grille.
- Twist the old filter cartridge a quarter-turn counterclockwise (or press the filter release button) and pull it straight out.
- Insert a new manufacturer-recommended filter cartridge and twist clockwise until it locks firmly into position.
- Dispense and discard two full gallons of water to purge trapped air bubbles and loose carbon fines from the line.
Integrating regular filter swaps into your household routine is one of the easiest home appliance care habits to cut energy bills and prevent unnecessary strain on your internal valves.
2. Thaw a Frozen Water Dispenser Tube
If you hear a quiet humming sound when pressing the dispenser paddle but no water comes out, the supply tube inside the freezer door may be frozen solid. Water supply lines run through or alongside the insulated freezer door to deliver cold water to the external niche. If the freezer temperature drops too low or if cold air vents point directly at the line, water trapped inside the hose will freeze into an ice plug.
To verify if your line is frozen, disconnect the quick-connect water fitting at the bottom door hinge and press the dispenser paddle. If water trickles out of the door hinge connector, the ice blockage is located inside the upper door tubing.
Here is how to safely thaw the dispenser line:
- Turn off the water supply valve behind the refrigerator and unplug the power cord from the wall outlet.
- Open the freezer door and locate the point where the dispenser line feeds through the panel.
- Aim a handheld hair dryer set on low heat at the bottom section of the door panel and dispenser chute, keeping the dryer at least six inches away from plastic surfaces to prevent warping.
- Move the dryer back and forth continuously for 10 to 15 minutes until melted water drains out of the dispenser tip.
- Check your freezer temperature settings using a standalone thermometer. Maintain a cabinet temperature between 0°F and 5°F. Setting the freezer lower than 0°F significantly increases the risk of recurrent line freezing.
If you notice erratic temperatures across compartments, inspect your control settings or check why your refrigerator is freezing food to ensure proper damper airflow.
3. Inspect the Water Supply Line Valve
Your dispenser cannot output water if the main supply line behind the refrigerator is closed, pinched, or clogged. Refrigerator water lines are usually constructed from thin copper tubing or flexible PEX plastic. When pushing the refrigerator back against the kitchen wall after cleaning, it is easy to accidentally crush or kink these soft water lines.
Follow these steps to check the supply line:
- Carefully roll the refrigerator forward away from the wall to access the rear connections.
- Inspect the flexible supply line stretching from the home shutoff valve to the back of the appliance. Look for sharp bends, flat spots, or severe twists that restrict fluid flow.
- Straighten any kinks gently. Plastic tubing that has developed permanent creases or white stress marks should be replaced immediately to prevent future leaks.
- Locate the dedicated home shutoff valve under the kitchen sink or behind the unit. Ensure the valve handwheel or lever is turned fully open counterclockwise.
- If your system uses a saddle valve, turn the T-handle completely clockwise to clear mineral buildup on the needle tip, then turn it all the way counterclockwise to open the flow.
4. Test and Replace the Water Inlet Valve
The water inlet valve is an electrically operated solenoid valve located at the bottom rear of your refrigerator. When you press the door dispenser paddle, the control board sends 120 volts of electricity to the dual-solenoid coil. This opens the internal plunger and allows household water pressure to push water up to the door tip.
If the solenoid coil burns out or if mechanical debris jams the internal diaphragm, the valve will not open even when receiving power signals.
To safely inspect and test the valve:
- Unplug the refrigerator from the electrical outlet and shut off the household water valve.
- Remove the lower metal access panel on the back of the appliance using a nut driver.
- Locate the inlet valve assembly where the home water hose connects.
- Inspect the plastic valve body for hairline cracks, mineral crusting, or active water droplets.
- Disconnect the wire harness connected to the dispenser solenoid coil.
- Set a digital multimeter to the RX10 ohms setting and touch the probes to the valve's electrical terminals. A functional coil typically displays a resistance reading between 200 and 500 ohms. A reading of infinity (open circuit) or zero ohms indicates a burned-out coil that requires replacement.
Replacement dual-solenoid water valves generally cost between $25 and $60 for the raw part, depending on your brand and model number.
5. Check the Dispenser Door Switch and Pad
When you press a glass against the dispenser actuator paddle, a small mechanical microswitch inside the door housing closes to complete the electrical circuit. This signals the water inlet valve to energize. If this switch wears out, breaks, or gets stuck from dried juice or syrup spills, pressing the paddle produces no sound and no water flow.
To troubleshoot the switch mechanism:
- Open the freezer door and manually press the main door light switch pin. Most modern appliances automatically disable the ice and water dispenser whenever the door frame switch detects an open door.
- Press the water dispenser paddle while listening closely. If you do not hear a distinct physical click from behind the control trim, the internal switch actuator arm may be broken or misaligned.
- Unplug the unit, pry off the plastic dispenser fascia carefully using a putty knife, and locate the microswitch assembly.
- Test the microswitch terminals for electrical continuity using a multimeter while depressing the switch button manually.
- If the switch lacks electrical continuity when pressed, unclip the wire harness and snap a new microswitch into the door housing.
Quick Refrigerator Water Dispenser Troubleshooting Guide
Use this quick reference table to match your dispenser's symptoms with the most likely cause and recommended action.
| Symptom | Primary Cause | Recommended Action |
|---|---|---|
| Silent when paddle is pressed | Faulty door switch or failed solenoid coil | Test microswitch continuity; inspect water inlet valve |
| Loud hum, but zero water flow | Frozen water line in door or closed supply valve | Thaw door line; verify home supply valve is open |
| Water trickles slowly | Clogged filter or kinked supply hose | Replace filter cartridge; straighten rear PEX line |
| Dispenser drips continuously | Stuck valve plunger or trapped air in line | Purge 2 gallons of water; replace inlet valve if dripping continues |
| Strange taste or odor | Expired carbon filter or dirty water line | Flush system with new OEM filter; sanitize reservoir |
When to Call a Pro
While replacing a filter or straightening a kinked hose is an straightforward DIY task, certain refrigerator water dispenser repairs carry higher risks. If your troubleshooting leads to complex electrical issues inside the main electronic control board, internal wiring harness failures inside the door cabinet, or persistent water leaks near electrical components, it is best to step back.
Attempting advanced electrical diagnostics without proper tools can cause component damage. Furthermore, if you discover underlying cooling issues in the sealed system alongside your dispenser problem, professional tools are required to inspect the refrigerant circuit.
Repairing internal solenoids or door wiring typically costs between $150 and $300 nationwide, depending on local rates and model complexity. When DIY fixes don't resolve the issue or you prefer an expert diagnosis, True Appliance Repair can match you with a local appliance pro to inspect your machine safely.
FAQ
How often should I change my refrigerator water filter?
Most appliance manufacturers recommend changing the refrigerator water filter every six months. However, if your household uses large quantities of water or if your municipal supply has high mineral content, you may need to replace the filter every three to four months to prevent flow restriction.
Why does my refrigerator make noise when I press the water dispenser?
A low humming or buzzing sound is completely normal when dispensing water. That sound comes from the electrical solenoid coil energizing the water inlet valve at the rear of the unit. However, if the humming sound occurs without any water flowing, it indicates the valve is receiving power but water is blocked by a frozen door line, a closed shutoff valve, or a clogged filter.
Can a clogged filter prevent the ice maker from working too?
Yes. In almost all modern refrigerators, the water dispenser and the automatic ice maker share the exact same incoming water line and filter housing. A severely clogged filter cartridge restricts water volume to both the door dispenser tip and the freezer ice mold fill tube.
How do I purge air pockets after installing a new water dispenser valve or filter?
After installing a new filter or water valve, trapped air pockets in the water line cause sputtering, surging, and minor dripping at the dispenser tip. To purge the air, hold the dispenser paddle down for 5 seconds, release it for 5 seconds, and repeat this cycle for roughly two gallons. This primes the system and creates a continuous, smooth stream.