
A laundry cycle that normally takes forty-five minutes can easily stretch past two hours when your washing machine fills at a trickle. Before you assume the worst about your appliance, know that a slow-filling washer is usually caused by a simple, easily fixable restriction in water flow. By systematically checking a few key points from the wall spigot down to the internal valve, you can usually restore proper water volume in under an hour without specialized tools.
Safety always comes first during any appliance inspection. Before touching water supply lines or working on internal components, unplug the washing machine from the electrical wall outlet and shut off both the hot and cold water supply valves behind the unit. Keep a small bucket and a few absorbent bath towels nearby to catch residual water trapped inside the supply hoses.
Check the Home Water Supply Valves First
The most straightforward reason for a washer filling slowly is a water supply line that is not fully open. Household shutoff valves can inadvertently get bumped or jarred during routine laundry room cleaning, or they may have been left partially closed during a recent plumbing project.
- Move the washing machine away from the wall carefully to gain clear access to the rear water supply box.
- Locate the hot (red) and cold (blue) handles or traditional round wheel valves attached to your household plumbing spigots.
- Turn both valve handles fully counterclockwise to ensure they are wide open.
- If your home features lever-style ball valves, verify that the levers line up parallel with the water supply hoses.
If the handles are completely open but water flow seems weak throughout your home, test the supply pressure directly at the spigot. Shut off the valves, disconnect the hoses, and direct the spigots into a five-gallon bucket. Slowly open each valve to confirm a strong, steady stream from both hot and cold municipal lines. If water dribbles out, the issue lies in your home plumbing system rather than the laundry appliance itself.
Inspect and Clean the Water Inlet Hose Screens
Sediment, rust particles, and mineral scale in municipal or well water routinely collect in the tiny filter screens situated inside the water connection ports on your machine. When these wire mesh screens fill with debris, water cannot pass through efficiently, causing extended fill times or triggering digital error codes.
- Confirm the wall water spigots are fully closed and the appliance power cord is disconnected.
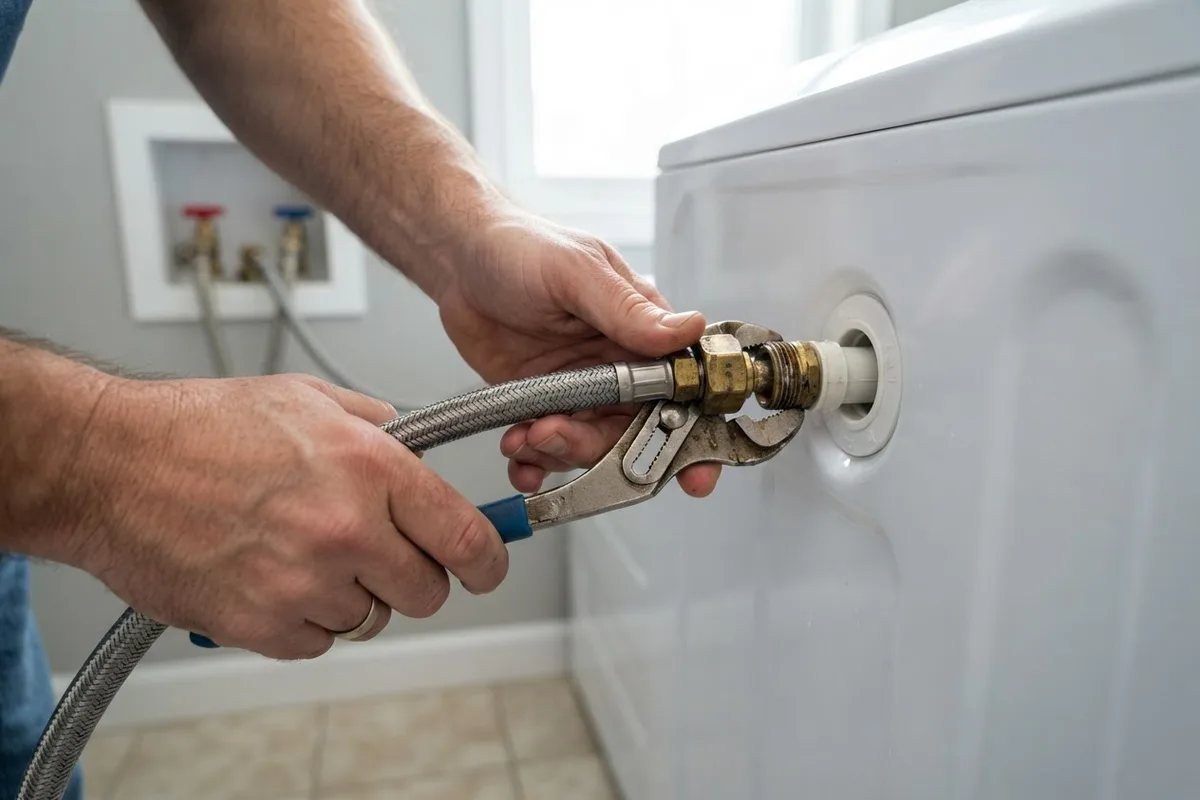
- Use channel-lock pliers to carefully unscrew the hot and cold supply hoses from the brass or plastic inlet ports on the back of the washer.
- Look inside the threaded intake ports on the rear panel. You will see small, dome-shaped wire mesh screens seated inside each port.
- Gently pry the mesh screens out using needle-nose pliers or a small pick, taking care not to puncture the fine wire mesh.
- Flush the screens under a fast-running kitchen faucet while scrubbing them softly with an old toothbrush. For stubborn mineral crust, soak the screens in a small cup of plain white vinegar for fifteen minutes before rinsing.
- Reinsert the clean screens firmly into the inlet ports, hand-tighten the hoses back on, add a quarter-turn snug with pliers, open the water supply valves, and inspect closely for drips.
Regularly cleaning these inlet filters is a core part of effective DIY appliance maintenance that prevents unnecessary stress on internal water valves.
Straighten Kinked or Pinched Water Supply Hoses
When a washing machine shifts during high-speed spin cycles or gets pushed too close to the rear drywall, flexible rubber or stainless steel braided hoses can easily twist, bend, or flatten. A pinched or severely kinked hose restricts water velocity significantly, forcing the main control board to wait longer for the tub to reach its targeted operating level.
- Carefully pull the appliance roughly six to eight inches out from the laundry wall.
- Inspect the full length of both the hot and cold water supply hoses from the wall valve connection down to the appliance inlets.
- Check for sharp bends, crushed spots, or physical stress near the hose couplings.
- Gently unkink any twisted sections by hand. If a rubber hose has developed a permanent crease, soft spot, or severe flatten mark, replace it immediately with a high-burst braided stainless steel hose to prevent catastrophic indoor flooding.
- When positioning the machine back into place, ensure at least four to six inches of rear clearance remains so the hoses maintain a smooth, wide bend radius.
If your laundry routine leaves unexpected detergent streaks alongside slow filling, reviewing why your washer is leaving residue on clothes can help identify secondary water flow and dilution issues.
Test and Clean the Washer Water Inlet Valve
If your wall water pressure is strong, the supply hoses are clear, and the inlet filter screens are spotless, the issue likely stems from the electric water inlet valve inside the machine. This component uses small electromagnetic solenoids to open internal rubber diaphragms whenever the machine requests hot, warm, or cold water. Over time, solenoid coils can burn out or hard water minerals can jam the internal valve mechanism.
- Disconnect the appliance power plug and confirm both wall shutoff valves are tightly closed.
- Remove the top main panel or upper console assembly by removing the rear mounting screws (consult your owner manual for exact disassembly steps).
- Locate the water inlet valve directly behind where the external supply hoses thread onto the back panel.
- Inspect the electrical wire harness attached to each solenoid coil for loose spade connectors or discoloration.
- Set a digital multimeter to measure resistance in Ohms (Ω) and touch the meter probes to the electrical terminal pins on each solenoid. A normal working solenoid typically measures between 2,000 and 4,000 Ohms. A reading of zero or infinite resistance indicates a failed coil that requires valve replacement.
Replacing a faulty water inlet valve is a straightforward DIY task. Disconnect the wiring harness, remove the mounting screws securing the valve bracket to the frame, clamp off the internal tub hose, swap in the new valve assembly, and resecure the fasteners securely.
Check the Water Pressure Switch and Hose
Your washing machine monitors internal water levels using a mechanical pressure switch or electronic level sensor connected to a thin plastic air tube. This air tube attaches to an air dome located at the bottom of the outer wash tub. As water fills the tub, air is trapped inside the tube and pushed upward, signaling the control board when the correct water level is reached.
If this thin plastic air tube becomes clogged with soap scum, lint, or mineral sludge, or if it develops a pinhole air leak, the machine receives inaccurate pressure signals. This can cause the appliance to fill extremely slowly, stall out mid-cycle, or fail to initiate the wash agitation step altogether.
- Ensure the machine is unplugged from the outlet.
- Remove the top cabinet cover panel to expose the upper wiring and pressure switch.
- Locate the plastic pressure switch, usually mounted near the top side housing or console frame.
- Carefully detach the flexible plastic tube from the pressure switch nipple.
- Blow firmly through the tube toward the lower wash tub. You should hear air bubbling freely through any remaining water in the bottom of the tub without resistance.
- Inspect the plastic tubing along its entire length for cracks, kinks, or oily residue. Reattach the tube securely or replace it if damaged.
DIY vs Pro Repair: Cost & Effort Comparison
Diagnosing water inlet problems helps homeowners decide whether a project matches their skills or requires specialized equipment. The comparison guide below outlines common causes, DIY effort levels, and standard repair cost ranges.
| Problem Cause | DIY Effort Level | Typical Component Cost | Professional Repair Range |
|---|---|---|---|
| Partially Closed Supply Valve | Easy (5 minutes) | $0 | $0 - $75 (Diagnostic) |
| Clogged Hose Mesh Screens | Easy (15 minutes) | $0 - $5 | $80 - $150 |
| Kinked Water Supply Hose | Easy (10 minutes) | $0 - $25 | $80 - $150 |
| Faulty Water Inlet Valve | Moderate (45 minutes) | $25 - $75 | $150 - $275 |
| Clogged Pressure Switch Hose | Moderate (30 minutes) | $0 - $15 | $120 - $220 |
Note: Professional repair costs vary based on geographic location, appliance brand, and local labor rates.
When to Call a Pro
While clearing clogged inlet screens or replacing kinked supply hoses is a great weekend DIY project, troubleshooting complex electronic control boards or internal household plumbing issues requires specialized knowledge. If multimeter tests reveal that your water inlet valve is not receiving electrical voltage from the control unit, or if you encounter persistent plumbing leaks behind the wall, it is best to pause work and consult a professional.
Working around internal electrical components or high-pressure plumbing fittings carries inherent risks. If you are uncomfortable working with multimeter diagnostics or simply want an accurate diagnosis without the hassle, True Appliance Repair can match you with a local appliance pro to get your laundry routine back on schedule.
FAQ
How long should a washing machine take to fill?
On average, a modern washing machine takes between three to seven minutes to fill completely, depending on cycle selection, load size, and household water pressure. If your machine takes longer than ten to twelve minutes to fill, it indicates a restricted water supply or a failing inlet valve.
Can hard water cause a washer to fill slowly?
Yes. Hard water contains high concentrations of dissolved minerals like calcium and magnesium. Over time, these minerals form crusty white deposits inside the inlet hose screens and valve ports. Periodic cleaning with white vinegar dissolves these deposits and restores proper flow rate.
Why is my washer filling slowly on cold water only?
If your machine fills normally during hot cycles but slowly on cold settings, the issue is isolated to the cold water supply line. Common causes include a partially closed cold water wall valve, a clogged cold-side mesh screen, or a burned-out cold water solenoid coil on the dual inlet valve assembly.
How much does it cost to replace a water inlet valve?
Replacing a washing machine water inlet valve yourself usually costs between $25 and $75 for the replacement part. If you schedule professional service through washer and dryer repair services, total costs typically range from $150 to $275 including labor and diagnostic fees.