
A puddle of water spreading across your laundry room floor can instantly derail your chores and spark worries about expensive home water damage. Pinpointing the cause of a washer leaking water is often far simpler than it appears, whether the drip occurs while the machine fills, agitates, or drains. By identifying where the moisture originates, you can take direct action and fix the issue before it worsens.
Always safety-test your workspace before troubleshooting any major home appliance. Unplug the washing machine from the wall electrical outlet and turn off both the hot and cold water shutoff valves behind the unit before touching hoses or internal components. If you suspect gas line connections or complex internal wiring issues, stop immediately and contact a qualified technician.
Check and Tighten the Water Supply Hoses
Water supply hoses attached to the back of your washing machine operate under constant home water pressure. Over time, vibration during vigorous spin cycles can loosen these connections, or the internal rubber washers can crack, harden, and fail. If you notice water dripping down the back wall or pooling beneath the rear feet during the fill cycle, supply hoses are usually the primary culprit.
Start by sliding the appliance away from the wall to gain clear visibility of the hot and cold water shutoff valves. Use a dry paper towel to wipe down each connection point; fresh moisture will immediately reveal small pinhole leaks or seepage around the threaded couplings. Hand-tighten any loose hose fittings, turning them clockwise. If the dripping persists, shut off the wall supply valves, unscrew the hoses, and inspect the internal rubber hose gaskets inside the coupling ends.
Replacing dried-out rubber washers costs only a couple of dollars at any local hardware store and takes under five minutes. If your hoses show visible bulging, cracking, or rusted metal fittings, replace the entire set with braided stainless steel supply lines. Braided lines resist bursting far better than standard rubber hoses and form part of essential appliance maintenance tasks that save money over time.
Clear and Secure the Drain Hose
When a washing machine leaks exclusively during the drain or spin cycle, the problem almost always stems from the drain line assembly. The corrugated plastic hose carries wastewater from the internal pump to your home standpipe or utility sink. Rapid water discharge creates backpressure, which can force water out if the hose is loose, kinked, or inserted too far into the drain pipe.
Inspect the entire length of the flexible drain hose for physical kinks, tight bends, or hairline cracks along the plastic ribs. Ensure the hose end rests inside the wall drain pipe with an adequate air gap, secured by a plastic bracket or zip tie so it cannot jump out during heavy pumping. A drain pipe clogged with lint or soap scum can also overflow, causing water to run down the wall and spill onto the floor. Clearing minor drain pipe clogs with a flexible wire drain snake often restores full drainage capacity.
Additionally, check the connection point where the drain hose clamps onto the back of the washer. A loose spring clamp or worm-gear hose clamp can allow wastewater to trickle down the rear cabinet panel. Tighten the clamp firmly with a screwdriver, ensuring the rubber sleeve sits square over the plastic outlet port.
Clean and Inspect the Front-Load Door Gasket
Front-loading washing machines rely on a thick rubber door boot gasket to create a watertight seal during operation. Soap residue, hair, lint, and small foreign objects like coins or paper clips frequently lodge inside the lower folds of this rubber seal. Over time, trapped debris holds the rubber slightly away from the glass door frame, letting water leak down the front panel onto the floor.
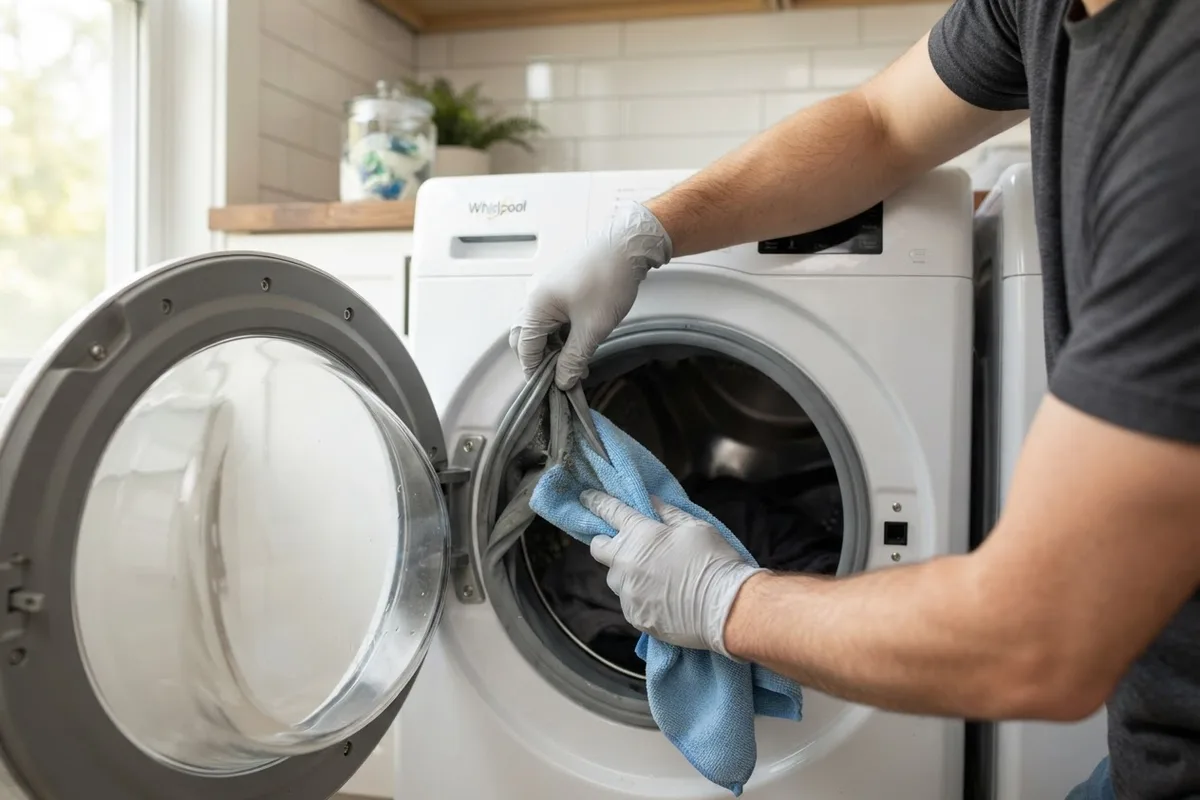 Open the washer door and carefully pull back the folds of the rubber gasket around the entire perimeter. Use a damp microfiber cloth soaked in warm water and mild dish soap to wipe away slime, mold, and trapped debris. Dry the folds thoroughly with a clean towel to check for physical damage.
Inspect the rubber material for small tears, punctures, or sharp cuts. Even a tiny hole in the bottom quadrant of the boot seal will release water during the wash and rinse cycles. Small surface debris can be cleaned away easily, but a torn or degraded door boot gasket must be replaced to permanently stop the leak. Keeping this rubber seal clean also prevents odor buildup, which is crucial if your washer is not spinning properly due to moisture or sensor issues.
Clean Out the Drain Pump Filter
Most modern front-load washers and some top-load models feature a accessible drain pump filter located behind a small access panel near the bottom front corner. This filter catches stray items before they reach the electric drain pump impeller. When the filter housing becomes clogged with lint, coins, or small garments, water backs up inside the housing, or the filter cap gasket loses its tight seal, resulting in front-side floor leaks.
Before opening the pump filter cap, place a low-profile baking pan and several old towels directly underneath the access door, as residual water will escape when the plug is loosened. Unplug the machine, open the access door, and slowly turn the filter cap counterclockwise. Allow accumulated water to drain completely into your pan before pulling the filter screen all the way out.
Remove all trapped lint, debris, and lost items from the filter basket, then rinse it under hot tap water. Use a flashlight to inspect the filter housing cavity inside the machine for remaining coins or objects. Before screwing the filter plug back in, wipe down the rubber o-ring seal on the cap to remove grit. Thread the cap back in cleanly and hand-tighten until snug; an unevenly threaded cap will leak heavily during the next wash cycle.
Clean the Detergent Dispenser Drawer
Water leaking down the front cabinet face directly underneath the soap drawer usually points to a clogged dispenser housing. Modern washing machines pump fresh water through small overhead jets inside the dispenser slot to flush laundry detergent, bleach, and fabric softener into the tub. Overusing high-efficiency (HE) soap or using thick fabric softeners creates a gooey buildup that blocks these channels.
When water enters a clogged dispenser drawer, it cannot flow downward into the wash tub quickly enough. The excess water overflows the front lip of the drawer and trickles down the outer cabinet frame. Pull the dispenser drawer out fully while pressing the release tab inside the center compartment.
Soak the drawer in a sink filled with warm water and scrub away hardened soap residue with an old toothbrush. Reach inside the dispenser cavity in the machine frame with a soft brush to clear lint and soap scale from the top spray nozzles and bottom drain port. Reinsert the clean drawer, switch to lower quantities of HE detergent, and avoid filling liquid compartments beyond their designated maximum fill lines.
Inspect Internal Hoses and the Water Inlet Valve
If your washing machine drips water from the center bottom of the cabinet and external hoses show no signs of leakage, an internal line or component seal may have failed. Internal components include the water inlet valve assembly, internal tub-to-pump bellows, and the main tub gasket. Accessing these parts requires removing either the back panel or top lid depending on your appliance design.
Always disconnect the power cord and shut off both home water valves before removing cabinet panels. With the panel off, examine the plastic body of the water inlet valve where the home hoses connect. Cracks in the plastic valve housing or mineral corrosion around the internal solenoid coils indicate a failing valve that requires full component replacement.
Next, examine the large rubber hoses connecting the outer tub to the drain pump assembly. Check for loose wire clamps, physical rubbing against the frame, or soft spots in the rubber hose material. Tightening a loose internal clamp or replacing a damaged tub-to-pump hose restores a watertight seal without needing full machine replacement.
Washer Leak Troubleshooting Guide
| Leak Location | Common Cause | Primary DIY Action |
|---|---|---|
| Rear of machine during fill | Loose supply hoses or worn rubber washers | Tighten hose couplings; replace rubber gaskets |
| Rear of machine during drain | Loose drain hose or clogged standpipe | Secure clamp; clear drain pipe obstructions |
| Front glass door seam | Dirt, lint, or torn rubber door boot gasket | Clean rubber folds; replace torn boot seal |
| Bottom front corner | Clogged drain pump filter or loose filter cap | Drain housing, clean filter screen, tighten cap |
| Front panel under drawer | Oversudsing or clogged soap dispenser jets | Scrub dispenser drawer and clean top spray jets |
| Center bottom of cabinet | Cracked water valve or loose internal tub hose | Inspect internal lines; replace damaged hoses |
When to Call a Pro
While simple washer leak causes like loose hose fittings, dirty door boots, and clogged pump filters are straightforward DIY projects, certain repairs require specialized technical skills. Internal tub seal failures, cracked outer tub assemblies, and worn main drum bearings require dismantling major structural components of the washing machine.
If you find water leaking from the center shaft under the transmission or notice electrical components exposed to moisture, stop your repair efforts immediately. Working with high-voltage components or deep mechanical teardowns poses safety risks for untrained homeowners. Repair costs for standard washing machine leaks typically range from $120 to $300 for hose, valve, or pump seal service, depending on your geographic region and machine model.
When a leak proves difficult to trace or requires complex mechanical disassembly, True Appliance Repair can match you with a local appliance pro to get your laundry room functioning safely again.
FAQ
Why is my washing machine leaking water only during the spin cycle?
A leak that occurs strictly during the spin cycle points to the drainage path or heavy tub movement. When the machine spins, the pump operates at maximum speed to clear water, which can force leaks out of loose drain hose clamps, cracked pump seals, or an overflowing wall drain pipe. Excessive vibration during the spin cycle can also temporarily shift loose hose connections, allowing water to escape.
Can using too much detergent cause a washing machine to leak?
Yes, using excess laundry detergent—especially non-HE formulas in high-efficiency washers—creates an abundance of suds. Oversudsing traps air and water, forcing foam and liquid out through air vents, door seals, or the detergent drawer frame. Always use recommended HE detergents and stick to the manufacturer's suggested dose to prevent foam overflows.
How much does it typically cost to fix a leaking washing machine?
Simple DIY fixes like replacing supply hose washers or cleaning pump filters cost under $10 in materials. If an internal component like a water inlet valve, drain pump, or door boot gasket needs professional replacement, typical service costs range between $150 and $350 depending on local labor rates and specific parts required for your brand.
Should I shut off the water valves when my washer is not in use?
Shutting off the water supply valves when your washing machine is idle is an excellent habit, especially when leaving home for extended periods. Water supply hoses remain under constant pressure from your municipal system, and a burst hose can release hundreds of gallons of water in a short time. Installing quarter-turn single-lever shutoff valves makes turning off water lines fast and easy.