
Skipping basic home appliance maintenance is one of the fastest ways to shorten the lifespan of your household equipment and spike your monthly energy bills. Dust buildup, clogged drains, and kinked hoses force motors and heating elements to work twice as hard, leading to premature mechanical failures. Fortunately, executing a few preventative routines can prevent up to 80% of common appliance breakdowns. By adding these straightforward appliance maintenance tasks to your home care routine, you will protect your investment, keep utility costs low, and avoid sudden household disruptions.
Clear Dust and Lint From Condenser Coils
Refrigerator condenser coils release heat from inside the cabinet into the surrounding kitchen air. When these coils accumulate pet hair, grease, and dust, the compressor must run longer and hotter to maintain safe food temperatures. Over time, this extra strain degrades the motor and significantly increases electricity consumption.
- Unplug the refrigerator or shut off power at the main breaker box for safety.
- Locate the condenser coils, typically found behind a bottom toe-kick grate or on the lower rear panel of the unit.
- Snap off the plastic grate or unscrew the rear access panel using a screwdriver.
- Use a long, flexible condenser coil brush to gently scrape away stubborn lint and dust trapped between the coil loops.
- Vacuum up all loose debris using a vacuum hose attachment.
- Reattach the protective panel or grate and plug the appliance back into the wall outlet.
Performing this task every six months keeps your refrigerator cooling efficiently and prevents costly compressor burnouts.
Clean and Flush Dishwasher Drain Strainers
A dishwasher cannot clean your plates if it is washing them in recycled, dirty water. Food bits, grease, and paper labels quickly accumulate in the bottom filter assembly, causing foul odors, cloudy glassware, and standing water in the tub.
- Pull out the lower dish rack completely and set it aside.
- Locate the cylindrical filter assembly at the bottom of the tub beneath the lower spray arm.
- Twist the upper filter counterclockwise to unlock it, then lift it straight out.
- Remove the fine mesh filter screen underneath the main cylinder.
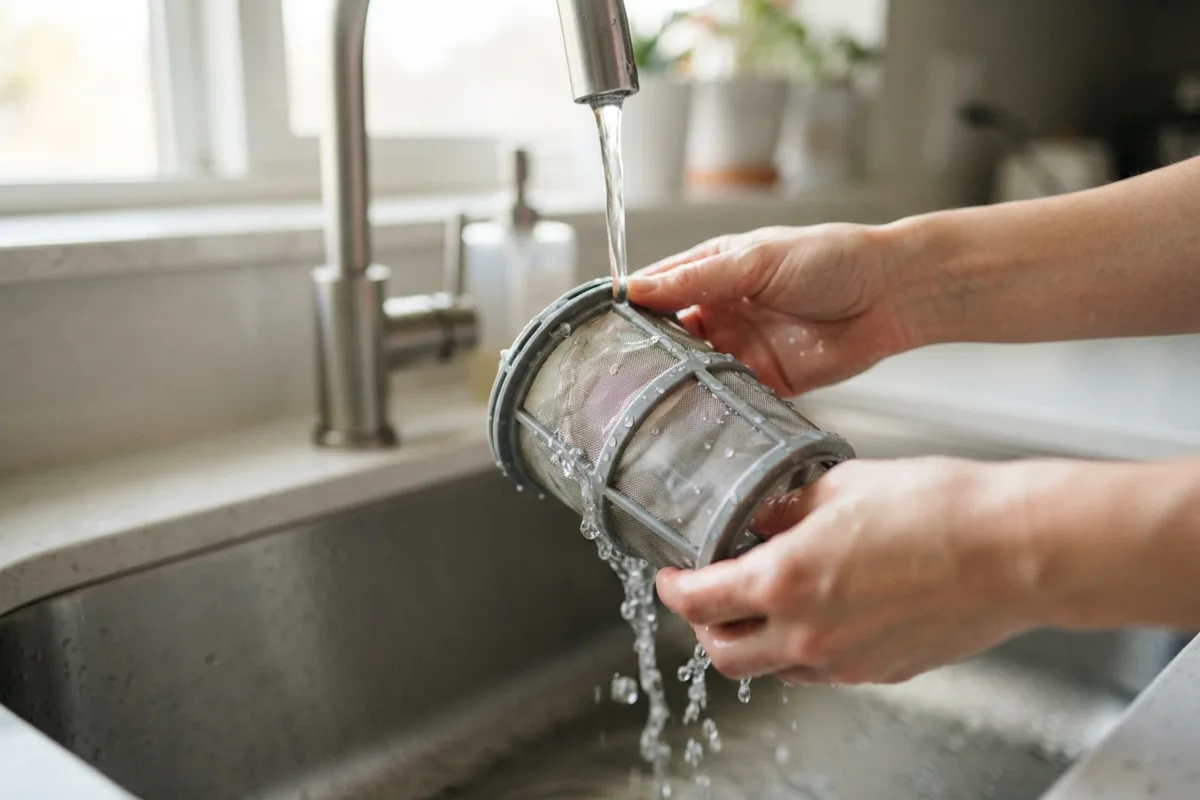
- Rinse all filter components under warm running water, scrubbing gently with a soft sponge or nylon dish brush and mild dish soap to remove grease and lime deposits.
- Check the exposed sump pit for solid objects like broken glass, toothpicks, or seeds, and carefully clear them out.
- Reassemble the filter system, ensuring it locks securely back into place to prevent food particles from entering the drain pump.
Regular filter cleaning prevents standing water problems and protects the pump impeller from mechanical damage. If your unit still fails to fill or drain properly after cleaning, review our guide on why your dishwasher is not filling with water.
Deep Clean the Dryer Duct and Vent Lines
Lint buildup inside your clothes dryer vent line is a major fire hazard and the primary cause of slow drying cycles. When exhaust air cannot exit your home freely, moisture stays trapped inside the drum, forcing the dryer to run multiple long cycles to dry a single load of laundry.
- Unplug electric dryers from the wall outlet. For gas dryers, turn off the manual gas shutoff valve behind the unit before moving it.
- Carefully slide the dryer away from the wall to access the exhaust connection.
- Loosen the vent clamp securing the flexible duct to the back of the dryer using a screwdriver or nut driver.
- Disconnect the vent hose and vacuum accumulated lint from both the dryer outlet port and the interior of the flexible hose.
- Feed a flexible dryer vent cleaning brush kit through the duct wall pipe to loosen packed lint all the way to the exterior wall cap.
- Go outside, remove the exterior vent cover, and clear away loosened lint and bird nests or debris.
- Reconnect the ductwork, secure clamps tightly, push the dryer back into place, and restore power.
Inspect Washer Hoses and Clean Trap Screens
Washing machine supply hose failures are among the leading causes of catastrophic indoor water damage. High water pressure continuously stresses rubber hoses, leading to microscopic cracks, internal swelling, and sudden bursts.
- Turn off the hot and cold water supply valves located behind the washing machine.
- Unplug the washer from the wall outlet.
- Place a small bucket and rag behind the machine to catch excess water.
- Unscrew the water supply hoses from the inlet valves on the back of the washer using slip-joint pliers.
- Inspect the small mesh filter screens embedded inside the inlet valve ports. Use needle-nose pliers to remove them, rinse away sediment, and reinstall them.
- Examine the full length of both rubber hoses for cracks, bulges, brittleness, or rusting fittings.
- Replace standard rubber hoses every three to five years with braided stainless steel lines, which resist high-pressure bursts.
Taking ten minutes to check these connections safeguards your home against sudden flooding. If you notice unusual shaking or stopping during wash cycles, check our troubleshooting guide for why a washer is not spinning.
Degrease Range Hood Filters and Baffle Traps
Range hood vents pull smoke, steam, and airborne cooking oils away from your stove top. When grease coats the aluminum mesh or stainless steel baffle filters, airflow drops dramatically. This leaves smoke trapped inside your kitchen and creates a hazardous fuel source right above your cooktop burners.
- Remove the mesh or baffle filters from the underside of the range hood by pulling the release latches.
- Fill a sink or large wash basin with boiling water.
- Add 1/4 cup of baking soda and 1 tablespoon of grease-cutting liquid dish soap to the water, stirring until suds form.
- Submerge the filters completely in the solution and allow them to soak for 15 to 20 minutes.
- Scrub the filters with a non-abrasive scrub brush to lift loosened grease and food residue.
- Rinse thoroughly with hot tap water and allow them to dry completely on a towel before reinstalling.
Cleaning range hood filters every one to two months ensures optimal ventilation and reduces smoke buildup while cooking.
Freshen and Inspect Your Garbage Disposal
Garbage disposals handle heavy daily food waste, making them prone to organic sludge accumulation, bad odors, and jammed impellers. Maintaining the grinding chamber prevents motor strain and keeps plumbing drain lines clear.
- Shut off electrical power to the unit at the main circuit breaker panel or unplug it under the sink.
- Shine a flashlight into the drain and use tongs or pliers—never your hands—to remove any visible foreign objects like bone fragments, twist ties, or utensils.
- Scrub the underside of the rubber splash guard using an old toothbrush dipped in a dish soap and warm water solution.
- Restore power to the disposal.
- Fill the disposal chamber with two cups of ice cubes and one cup of coarse rock salt.
- Turn on cold water, run the disposal, and allow the ice and salt to grind away stubborn residue stuck to the rotating impellers and inner wall.
- Finish by grinding chopped citrus peels to neutralize remaining odors and leave a fresh scent.
For more complex operating issues or persistent jams, refer to our walkthrough on garbage disposal DIY fixes.
Quick-Reference Appliance Care Schedule
| Appliance | Task | Recommended Frequency | Potential Failure If Neglected |
|---|---|---|---|
| Refrigerator | Clean Condenser Coils | Every 6 Months | Compressor Overheating / High Energy Bills |
| Dishwasher | Clean Strainer Filter | Monthly | Foul Odors / Poor Cleaning / Drain Pump Damage |
| Clothes Dryer | Clear Vent Pipe & Duct | Every 6 to 12 Months | Fire Hazard / Long Drying Cycles |
| Washing Machine | Inspect Hoses & Screens | Every 6 Months | Hose Bursts / Severe Water Damage |
| Range Hood | Degrease Mesh Filters | Every 1 to 2 Months | Reduced Airflow / Grease Fire Risk |
| Garbage Disposal | Grind Ice, Salt & Citrus | Monthly | Jammed Impellers / Plumbing Clogs |
When to Call a Pro
While simple cleaning and visual inspections are ideal for DIY maintenance, certain appliance conditions require professional technical intervention. Attempting to repair internal gas connections, sealed refrigeration circuits, or main electronic control boards without specialized training can cause serious personal injury or severe property damage. Always disconnect power and shut off water or gas lines before attempting any hands-on inspection. If you encounter burning electrical smells, gas leaks, continuous water leaks, or failed sealed system components, stop immediately and seek expert assistance.
Professional service calls typically range from $100 to $300 for standard diagnostic and repair work, varying by area, appliance brand, and task complexity. When maintenance tasks reveal complex component failures, True Appliance Repair can match you with a local appliance pro to diagnose and repair your machinery safely and efficiently.
FAQ
How often should these appliance maintenance tasks be performed?
Most routine maintenance tasks, such as cleaning dishwasher filters, range hood vents, and garbage disposals, should be done monthly or bimonthly. Heavy-duty tasks like cleaning refrigerator coils and flushing dryer vent ducts are best completed every six to twelve months depending on household usage and pet density.
Can routine appliance maintenance lower my monthly electric bill?
Yes. Appliances running with clean filters, unobstructed vents, and dust-free coils operate significantly more efficiently. For example, a refrigerator with clean condenser coils uses up to 15% less electricity than one coated in pet hair and dust, leading to noticeable savings on utility bills over time.
What basic tools do I need for DIY appliance care?
Detailed appliance care requires only inexpensive household tools. A flexible dryer vent brush, a condenser coil brush, slip-joint pliers, a flashlight, a vacuum with hose attachments, and standard screwdrivers cover almost every task outlined in this guide.
How do I know whether to repair or replace an aging appliance?
A good rule of thumb is the 50% rule: if an appliance is past half its expected lifespan and a single repair costs more than 50% of a brand-new unit, replacement is usually the smarter choice. Check our detailed guide on how long home appliances last to estimate the remaining lifespan of your household machines.