
You set your oven to preheat, come back fifteen minutes later, and discover the interior is barely lukewarm while your dinner sits uncooked. When the bottom heating coil remains dark and cold, you are left dealing with an oven bake element not heating. Fortunately, diagnosing and resolving this common kitchen breakdown does not always require an expensive overhaul, as long as you follow a systematic safety-first process.
Before undertaking any hands-on inspection or electrical testing, safety must come first. Always unplug the oven from the wall receptacle or flip the circuit breaker at your home's main panel to completely disconnect power. If you own a dual-fuel range with gas connections, shut off the gas supply valve before moving the appliance. Never touch internal wiring or heating elements while the unit is plugged in.
Inspect the Bake Element for Visible Damage
The bake element, located at the bottom of electric ovens, endures repeated cycles of high thermal stress. Over years of cooking, this constant expanding and contracting causes structural fatigue in the outer metal sheath. A physical inspection is the fastest way to confirm whether the heating coil has physically failed.
- Disconnect electric power to the oven at the breaker panel or wall outlet.
- Open the oven door and remove all wire racks to access the bottom cavity.
- Examine the black outer metal tube of the bake element along its entire loop.
- Look for visible blisters, hairline cracks, flaking metal, or obvious burn spots.
- Check the rear terminals where the element connects to the back wall for melting or corrosion.
If you discover a visible break or blistered spot on the coil, the internal resistance wire has burned out and severed the electrical circuit. In this scenario, replacing the element is necessary to restore heat. If the metal tube appears entirely smooth and intact without signs of damage, move on to testing the component's internal electrical continuity.
Test the Heating Element with a Multimeter
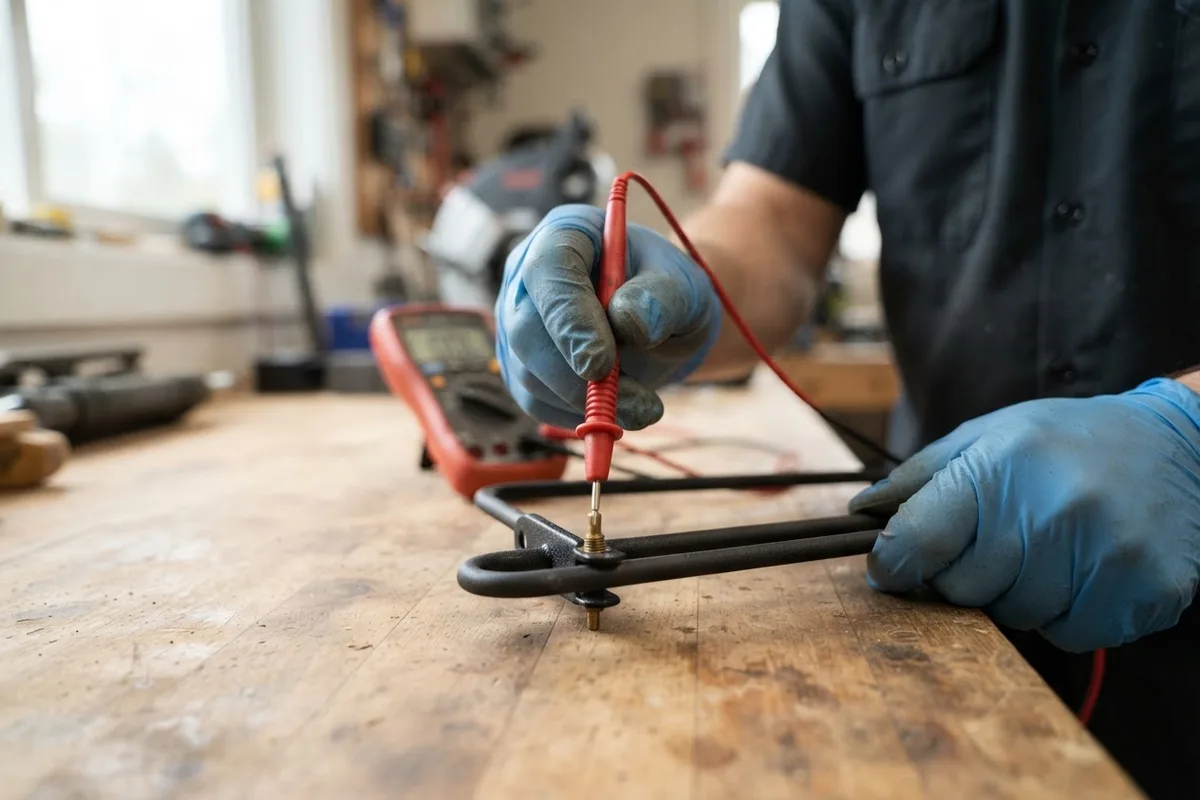
Even when an element looks perfectly intact on the outside, the internal nickel-chromium wire can break silently inside the insulating ceramic powder. Testing the component with a digital multimeter gives you an absolute answer regarding its electrical integrity.
- Confirm power is completely shut off to the range.
- Remove the mounting screws securing the bake element bracket to the rear wall.
- Gently pull the element forward a few inches into the cavity to expose the terminal ends.
- Carefully slip the wire harness leads off the element terminals using needle-nose pliers, being careful not to let the loose wires slip back through the rear wall opening.
- Set your digital multimeter to the lowest ohms (Ω) setting for continuity testing.
- Touch one multimeter probe to each terminal pin on the element.
A functional oven bake element typically yields a resistance reading between 20 and 40 ohms. If your multimeter displays an open loop (OL), infinite resistance, or zero continuity, the element is defective and requires replacement. Replacing a damaged coil is a straightforward DIY task that usually costs between $30 and $90 for standard replacement parts, depending on your range model.
Check for a Blown Thermal Fuse
Many modern electric ovens incorporate an inline thermal fuse or safety thermostat mounted on the back exterior wall or near the blower housing. This safety component protects your home by permanently opening the circuit if the oven temperature exceeds safe internal thresholds, such as during a high-heat self-cleaning cycle.
 When a thermal fuse trips, it cuts off power to the heating circuits. If your bake element tested fine with a multimeter but refuses to turn on, a tripped fuse is a prime suspect. Accessing the fuse requires sliding the range out from the wall and removing the rear sheet-metal panel. Touch your multimeter probes to the two metal terminals of the thermal fuse; if the meter shows no continuity, the fuse has blown. Replacing a blown thermal fuse usually costs under $20 in parts, though you should also verify that cooling fan vents are unobstructed so the new fuse does not blow immediately.
Examine the Terminal Block and Wire Harness
High electrical current passes through the oven's internal wiring harness every time the bake cycle engages. Over time, terminal connections can loosen due to vibration and thermal expansion, creating electrical resistance that generates extreme local heat and burns through wire insulation.
- Verify power is off and pull the oven forward to access the rear panel.
- Unscrew the back cover panel to expose the main power terminal block and wire harness.
- Inspect the wire leads connecting the control board down to the bake element terminals.
- Look for charred wire insulation, discolored spade connectors, or melted plastic housings.
- Check for loose screw connections at the main terminal block where the wall cord attaches.
If you find burnt or oxidized connectors, the affected wire section must be cut back, stripped, and fitted with high-temperature female spade terminals rated for appliance use. Connecting damaged wires to a new element will cause the connection to overheat and fail again quickly. If you notice broader electrical issues in your kitchen, review our guide on how to reset home appliances to rule out simple control glitches before replacing hardware.
Test the Control Board Bake Relay
The electronic control board acts as the brain of your appliance, using mechanical relays to send 240 volts of electricity to the bake element when you select a baking temperature. If the control board's internal bake relay contacts burn out or weld shut, power will never reach the bottom element.
Testing the control board requires checking for voltage output at the bake element terminals while the unit is energized, which poses serious electrical hazards. For safety reasons, you can perform a passive check by unplugging the unit and visually inspecting the circuit board trace lines on the back of the control assembly. Look for dark scorch marks, burnt solder joints, or swollen capacitors on the board surface.
If the bake element, thermal fuse, and wiring pass all continuity checks, but no voltage reaches the element during operation, the main control board has likely failed. If you suspect control board failure or are dealing with a gas unit that displays different heating symptoms, learn more about gas oven igniter glowing but not igniting to compare heating component behaviors.
| Failure Point | Primary Symptom | DIY Difficulty | Typical Repair Cost Range |
|---|---|---|---|
| Burned Bake Element | Visible cracks, zero continuity | Low (15-30 min) | $30 - $90 (Parts) |
| Blown Thermal Fuse | No heat, complete open circuit | Medium (30-45 min) | $15 - $35 (Parts) |
| Loose/Burnt Wiring | Intermittent heat, visible charred insulation | Medium (30-60 min) | $10 - $25 (Parts) |
| Defective Control Board | No power signal sent to element, board scorch marks | High (45-60 min) | $150 - $350 (Parts) |
When to Call a Pro
While swapping out a damaged bake element or thermal fuse is within reach for most DIY homeowners, certain electrical repairs require specialized expertise. If your diagnostic testing points to a faulty main electronic control board, scorched internal wiring harnesses, or recurring high-voltage breaker trips, it is safest to hand the job over to an experienced professional.
Never attempt live voltage testing on an energized 240-volt circuit unless you have formal training and professional protective gear. Always stop immediately and contact a specialist for complex electrical panel work, gas line maintenance, or sealed-system failures. When in doubt, explore our dedicated oven and stove repair service options. If you prefer expert assistance at your doorstep, True Appliance Repair can match you with a local appliance pro to get your kitchen running safely again.
FAQ
How much does it cost to replace an oven bake element?
Replacing an oven bake element is one of the most budget-friendly appliance repairs. The replacement part itself typically ranges between $30 and $90 for standard electric ranges. If you choose professional installation, total costs generally range between $150 and $250, though exact pricing varies by area and oven model.
Can I still use my oven if the lower bake element is broken?
It is not recommended. While the upper broil element may still function, using only the broiler will blast direct high heat from above, burning the top of your food while leaving the interior raw. Furthermore, exposed or cracked heating coils can create short circuits that pose safety risks to the appliance's electronics.
Why would a brand-new bake element fail to heat up?
If a replacement bake element fails to warm up after installation, the element itself is rarely the issue. The underlying cause is usually a blown inline thermal fuse, a damaged wire connector, a misaligned spade terminal connection, or a faulty relay on the main electronic control board that prevents voltage from reaching the new coil.
How long do electric oven bake elements typically last?
With typical home cooking habits, an electric oven bake element lasts between 8 and 12 years. Factors such as frequent high-temperature self-cleaning cycles, grease accumulation, and power surges can shorten the operational lifespan of heating coils.