
Opening your washing machine after a white load only to find the bleach cup still full of liquid—or worse, discovering pale bleach spots on the next load of dark jeans—is a frustrating laundry day surprise. Most of the time, a washer bleach dispenser not working comes down to a clogged siphon cap, low water pressure, or dried residue blocking the flush nozzle rather than a major mechanical failure. Follow these five step-by-step DIY fixes to clear the blockage, restore proper draining, and protect your wardrobe.
Safety First: Before inspecting internal hoses, removing dispenser housings, or checking water inlet valves, always unplug your washing machine from the wall outlet and turn off both the hot and cold water supply valves behind the machine.
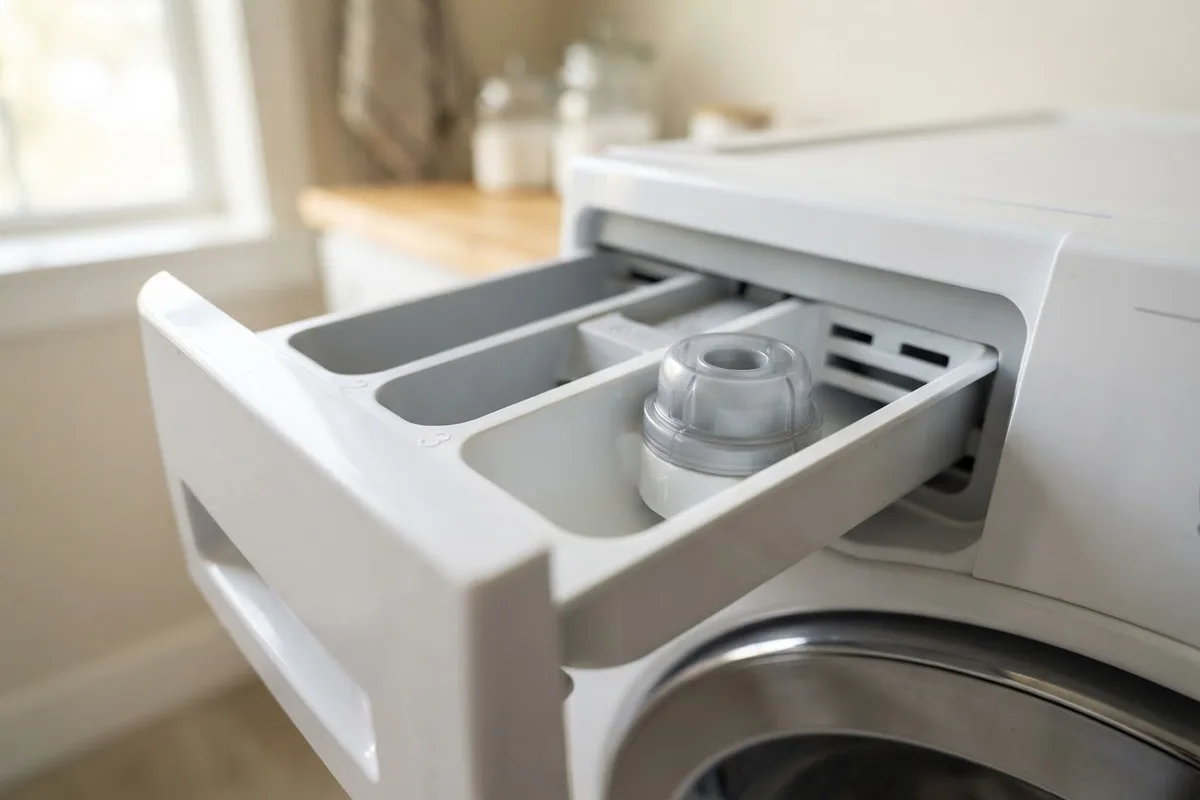
1. Soak and Scrub the Removable Siphon Cap
Most front-load and high-efficiency top-load washers use a small plastic siphon cap inside the bleach compartment. As water fills the cup above the max-fill line, gravity and suction pull the liquid up and down through a narrow tube. Over time, dried detergent splashes, lint, and mineral scale from hard water coat the inside of this cap, breaking the vacuum seal so the cup stays full of liquid.
- Open the dispenser drawer or locate the corner bleach cup on your top-loader.
- Pinch the plastic release tab or pull straight up on the removable cap inside the bleach compartment.
- Fill a bowl with warm water and two tablespoons of white vinegar. Note: Always rinse the compartment with plain water first so vinegar never mixes directly with liquid chlorine bleach, which creates hazardous fumes.
- Soak the siphon cap for 20 minutes, then scrub the underside stem with an old toothbrush or pipe cleaner.
- Snap the cap firmly back into place until it clicks.
2. Flush Out the Dispenser Drawer Housing
Even when the removable cap is spotless, gunk can build up inside the drain channel at the bottom of the drawer or along the upper water jets that spray down from the washer cabinet. If the overhead jets are crusted over with calcium deposits, water cannot enter the cup to trigger the siphon action.
- Pull the entire dispenser drawer out until it stops, then press the release lever at the back center of the tray to slide it completely out.
- Rinse the whole tray under hot running water at the kitchen sink, paying special attention to the outlet hole beneath the bleach section.
- Dip a long bottle brush into warm soapy water and scrub inside the open cavity in the washer where the drawer sits.
- Wipe the upper spray nozzles inside the cavity with a damp microfiber cloth to clear mineral crust.
- Pour one cup of hot water directly into the bleach well after reinstalling the drawer to confirm it siphons out completely.
3. Clean Clogged Water Inlet Valve Screens
Washing machines rely on strong household water pressure to shoot a stream of water into the bleach cup at the exact right moment in the wash cycle. If sediment from your home plumbing clogs the tiny mesh screens inside the water inlet valve, the water trickles in too slowly to start the siphon effect.
- Unplug the washing machine and turn Both hot and cold water shutoff valves completely off.
- Place a bucket and old towel under the back of the washer, then unscrew the hot and cold water supply hoses from the back panel.
- Peer inside the threaded valve ports on the back of the washer to find the small mesh filter screens.
- Gently flush the screens in place using a soft brush and a spray bottle of water, or carefully grip the edge with needle-nose pliers to rinse them under a faucet.
- Reattach the hoses tightly by hand, give them a quarter-turn with pliers, turn the water back on, and check for drips.
4. Level the Washing Machine Feet
Gravity plays a major role in how liquid moves through your dispenser tray. If your washer tilts forward, backward, or to the side opposite the bleach cup, incoming water may pool in the wrong corner of the drawer or miss the siphon tube entirely. Unbalanced machines can also cause other laundry room headaches, much like when you have to troubleshoot why your dryer is snagging clothes due to a shifted drum.
- Place a carpenter's bubble level on top of the washing machine cabinet, checking both front-to-back and side-to-side alignment.
- Locate the adjustable leveling legs at the bottom four corners of the washer.
- Loosen the locking nut on any low corner using an adjustable wrench.
- Turn the foot clockwise to lower the corner or counterclockwise to raise it until the bubble sits centered in the level.
- Tighten the locking nuts firmly against the base of the cabinet so the feet cannot vibrate loose during high-speed spin cycles.
5. Clear the Internal Dispenser-to-Tub Hose
On top-load washers with a corner bleach well—and behind the drawer housing on front-loaders—a flexible rubber hose carries diluted bleach down into the outer wash tub. If undissolved laundry pods, coins, or hardened mineral chunks slip down the chute, this hose can pinch or clog. keeping up with routine checks like this is a smart part of annual appliance maintenance steps that prevent surprise leaks.
- Unplug the washer and shut off the water supply.
- Pour a cup of hot tap water into the bleach dispenser and watch if it backs up immediately.
- Use a flexible plastic zip-tie drain snake or a long piece of smooth plastic tubing to gently probe the bottom drain opening of the bleach cup.
- Follow the flushing with two cups of hot water to push loosened debris into the main tub, then run a quick rinse-and-spin cycle.
- If the blockage will not budge, stop here—removing the cabinet top to unclamp the internal rubber hose is best left to someone experienced with appliance disassembly.
Quick Troubleshooting Reference Guide
Use this table to match what you see in your laundry room with the fastest fix and typical repair cost range.
| Dispenser Symptom | Most Likely Cause | DIY Fix | Typical US Cost Range (Varies by Area/Model) |
|---|---|---|---|
| Bleach cup full of clear water after cycle | Clogged siphon cap or unlevel machine | Soak siphon cap in warm water; level feet | $0 (DIY cleaning) |
| Raw bleach still sitting in cup untouched | Blocked water inlet screens or faulty valve | Clean inlet valve mesh screens | $0 DIY / $120–$230 for pro valve swap |
| Bleach leaks onto floor during fill | Cracked dispenser housing or loose internal hose | Inspect tray for cracks; check hose clamps | $35–$85 for replacement drawer tray |
| Bleach dispenses immediately when poured | Missing siphon cap or overfilled past Max line | Reseat siphon cap; pour below Max line | $10–$25 for replacement siphon cap |
| Dispenser overflows out the front | Clogged dispenser-to-tub rubber chute | Flush chute with hot water and plastic snake | $0 DIY / $110–$200 for pro hose clearing |
When to Call a Pro
If you have cleaned the siphon cap, scrubbed the drawer cavity, verified strong water pressure, and leveled the legs, the issue is likely electrical or mechanical. Most modern washers use an electric solenoid coil on the water inlet valve—or a motorized actuator arm on top of the dispenser housing—to direct water into the bleach cup at a specific point in the wash cycle. Testing solenoid resistance with a multimeter or replacing wiring harnesses behind the control panel requires specialized tools and safety precautions.
When a faulty water inlet valve, broken actuator motor, or split internal hose is to blame, professional washer and dryer repair is the safest route. Professional water inlet valve or dispenser actuator replacement typically runs between $140 and $280 in the US, though pricing varies by area and model. True Appliance Repair can match you with an independent local appliance pro who can diagnose the exact part failure and get your washer running smoothly again.
FAQ
Why is there always a little water left in my bleach dispenser?
Finding a teaspoon or two of clear water in the bottom of the bleach compartment after a cycle is completely normal. A small amount of water stays behind after the siphon vacuum breaks at the end of the flush cycle. However, if the cup is more than a quarter full or still smells strongly of chlorine bleach, the siphon cap is clogged and needs cleaning.
Can I pour liquid bleach directly into the washer drum instead?
Avoid pouring undiluted liquid chlorine bleach directly onto clothes or into a stainless steel washer drum. Undiluted bleach can rapidly weaken fabric fibers, leave permanent bleached-out spots on clothing, and pit or corrode internal metal components over time. If your dispenser is broken and you need to use bleach immediately, dilute the measured bleach in one quart of water first and pour it slowly into the water stream only after the tub has started filling.
Can I use vinegar to clean a clogged bleach dispenser?
Only use white vinegar after you have thoroughly flushed the dispenser cup and removable cap with plenty of plain tap water. Never pour vinegar into a compartment that still holds standing liquid chlorine bleach, as mixing bleach and acid releases dangerous chlorine gas. Plain hot water and a small scrub brush are sufficient for most routine bleach cup cleanings.
Why does my bleach dispenser release bleach right away when I pour it in?
If liquid drains straight into the washer tub the moment you pour it in, you have either poured past the "Max Fill" line or the removable siphon cap is missing or loose. Filling above the max line triggers the siphon gravity effect prematurely, dumping raw bleach onto dry clothes before the wash cycle even starts. Always check that the siphon cap is snapped down tight and measure below the indicator line.