
Opening your freezer to find soft ice cream, thawing meat, or lukewarm air is a stressful surprise, especially when your kitchen is stocked for the season. Before assuming the worst, remember that most cooling drops come from restricted airflow, dirty coils, or a simple door seal issue you can fix safely at home. Walk through these six practical steps to pinpoint the problem and get your freezer back down to 0°F.
1. Check the Thermostat and Temperature Settings
It sounds simple, but an accidental bump from a frozen pizza box or grocery bag is one of the top reasons a freezer warms up. Holiday grocery runs and kids grabbing snacks often nudge manual dials or digital touchpads out of range.
- Locate the freezer temperature control inside the upper compartment or on the front dispenser panel.
- Confirm the setting is at 0°F (-18°C) for digital displays, or near the middle-to-coldest mark on numbered dials.
- Verify that "Demo," "Showroom," or "Vacation" mode has not been turned on accidentally.
- Place an inexpensive appliance thermometer in a glass of cooking oil or between two frozen packages and wait four hours to read the real temperature.
- Allow up to 24 hours after adjusting a dial for the compartment to stabilize.
If you share cooling between sections, organizing your refrigerator for better cooling helps both compartments hold steady temperatures.
2. Clear Blocked Air Vents Inside the Freezer
Modern frost-free freezers rely on cold air circulating through small vents along the back or side walls. When bags of frozen vegetables or bulky holiday roasts press directly against those louvers, cold air cannot circulate evenly.
- Pull everything out of the top shelf and rear corners of the freezer and set items in an insulated cooler.
- Look along the rear wall for rectangular or slotted air vents.
- Remove any ice chunks, fallen food wrappers, or Frost-covered bags resting against the openings.
- Repack the freezer leaving at least two inches of breathing room between food packages and the back wall.
- Avoid overstuffing the door shelves, which keeps cold air from sweeping across the front items.
Keeping roughly 70 to 80 percent of your freezer filled helps maintain cold thermal mass without choking off airflow.
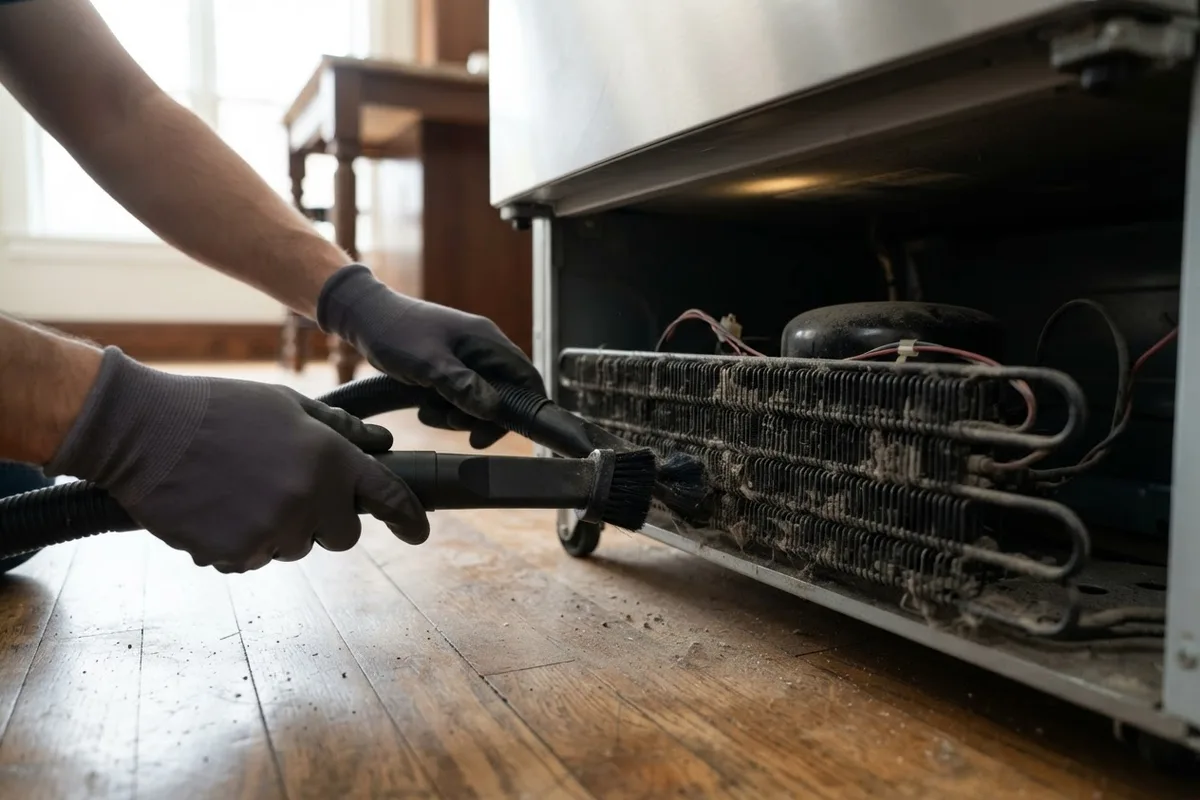
3. Clean Dust Off the Condenser Coils
Condenser coils sit underneath or behind your refrigerator-freezer and release heat pulled from inside the cabinet. When pet hair, kitchen grease, and dust blanket those coils, the compressor overheats and struggles to keep the freezer frozen.
- Unplug the appliance from the wall outlet or turn off its dedicated circuit breaker before touching any rear or bottom components.
- Pull the unit gently away from the wall or remove the front bottom toe grille by snapping it outward.
- Use a vacuum with a narrow crevice nozzle and a soft coil brush to lift dust and lint off the black metal tubes or fins.
- Wipe away leftover debris on the floor beneath the cabinet before sliding it back into place.
- Plug the unit back in and listen for smooth compressor operation.
Doing this twice a year while you deep clean your refrigerator also extends compressor life.
4. Inspect and Clean the Freezer Door Gasket
A dirty, stiff, or torn rubber gasket lets warm, humid kitchen air leak inside nonstop. That warm air raises the internal temperature and creates frost around the door frame, forcing the cooling system to work overtime.
- Wipe the entire rubber perimeter seal and the metal cabinet frame with warm water and mild dish soap, then dry both completely.
- Run your fingers around the gasket to feel for cracks, brittle spots, or gaps where the magnet pulls away.
- Perform the dollar-bill test: close the freezer door on a crisp dollar bill and pull gently. If it slides out with zero resistance, the seal is too loose.
- Warm slightly warped rubber gently with a hair dryer on a low setting for a few seconds so it reshapes flush against the frame.
- Dab a thin coat of food-grade silicone grease along the hinge side if the gasket binds when closing.
5. Check for Frost Blocking the Evaporator Fan
If the freezer fan is quiet or you see thick snow-like frost coating the back interior panel, the automatic defrost cycle may have fallen behind. Ice buildup can physically lock the evaporator fan blades or block air channels completely.
- Unplug the freezer and transfer frozen food to coolers packed with ice.
- Open the freezer door and inspect the rear interior panel for heavy white frost creeping through the vent slots.
- Leave the door propped open with towels at the base to catch meltwater until all visible frost melts naturally—never chip ice with knives or sharp tools, which can puncture refrigerant lines.
- Wipe the interior dry before restoring power.
- Listen closely after plugging it back in to confirm the interior fan spins smoothly when the door switch is pressed.
For more water-control tips during thawing, check our guide on how to prevent appliance leaks. If heavy frost returns within a few days, a defrost heater, defrost thermostat, or control board likely needs testing.
6. Test Freezer Airflow and Level the Cabinet
Even a healthy cooling system fails to freeze food properly if the door swings open slightly on its own or if cold air never reaches the compartment. Checking cabinet level and fan airflow takes just a few minutes.
- Place a carpenter's level across the top of the unit from side to side and front to back.
- Adjust the front leveling legs with a wrench so the cabinet tilts roughly a quarter-inch higher in front than in back, allowing the door to swing shut naturally.
- Open the freezer door and press the door-light switch manually with your finger.
- Hold your hand near the rear vents to verify you feel a steady stream of cold air blowing.
- Make sure the room temperature around a garage or basement freezer stays within the manufacturer's operating range, as freezing garages can trick shared thermostats into shutting off too early.
When to Call a Pro
Stop and call a qualified technician right away if you notice a burning electrical smell, repeated circuit breaker trips, a hot compressor that clicks on and off every few minutes, or zero cooling after a manual defrost. Never cut into sealed refrigerant tubing, handle refrigerant gas, or open the home electrical panel yourself—sealed-system and high-voltage repairs require specialized recovery tools and training.
| Symptom | Likely Cause | DIY vs. Pro | Typical US Repair Cost (Varies by Area/Model) |
|---|---|---|---|
| Warm air, dirty underneath | Clogged condenser coils | DIY cleaning | $0 DIY / $120–$200 pro cleaning |
| Frost around door edge | Loose or torn door gasket | DIY clean or replace | $50–$120 part / $150–$280 pro |
| Snow on back interior wall | Defrost system or fan issue | Manual thaw DIY; parts pro | $180–$400 |
| Clicking every few minutes | Start relay or compressor | Pro diagnosis recommended | $150–$350 relay / $450–$900+ compressor |
| Fan runs, zero cold air | Sealed system / refrigerant leak | Call a pro immediately | $300–$800+ |
If troubleshooting points to a failed evaporator fan motor, defrost heater, or sealed-system problem, True Appliance Repair can connect you with a local appliance repair pro to diagnose the unit safely before you replace the entire appliance.
FAQ
Why is my fridge cold but my freezer is not freezing?
In many two-door models, cold air originates in the freezer and blows down into the fresh food section, or a dual-evaporator system runs separately. If the fridge stays cold while the freezer warms, check for a faulty freezer fan, blocked return vents, or a failing defrost component on the freezer coil.
How long does a freezer take to get cold after fixing it?
After cleaning coils, clearing vents, or finishing a full manual defrost, an empty or lightly loaded freezer typically needs 6 to 12 hours to drop near 0°F. Wait a full 24 hours with minimal door openings before judging whether the repair worked.
Is food safe if my freezer thawed slightly?
According to standard food safety guidance, frozen food that still contains ice crystals or feels refrigerator-cold (40°F or below) can usually be refrozen safely, though texture may change. Perishable meat, poultry, or dairy that warmed above 40°F for more than two hours should be discarded.
When is it better to replace a freezer instead of repairing it?
Consider replacement if your refrigerator or standalone freezer is over 12 to 15 years old and needs a major compressor or sealed-system repair costing half the price of a new unit. For newer appliances with a faulty thermostat, fan motor, or door seal, repair is usually the more budget-friendly route.