
Moving into a new home brings excitement, but inherited appliances often hide years of neglected grease, lint, and limescale left behind by prior occupants. Running a quick move-in tune-up protects your home against catastrophic water leaks, electrical fires, and sudden mechanical breakdowns before you unpack your first grocery haul. This comprehensive checklist walks you through seven essential maintenance steps to ensure every major appliance runs safely, efficiently, and reliably from day one.
1. Inspect and Replace Rubber Washer Hoses
Always shut off the hot and cold water supply valves behind the washer and unplug the machine before inspecting hose connections. Old rubber washing machine hoses become brittle with age and can burst under municipal water pressure without warning, dumping hundreds of gallons of water into your laundry space.
- Pull the washer forward to inspect the black rubber inlet lines for bulging, cracking, frayed fabric casing, or corroded fittings.
- Look for date stamps on the hoses; if they are more than five years old or show visible wear, replace them immediately.
- Install braided stainless steel burst-proof hoses, which resist high pressure and accidental kinking when the washer shifts.
- Thread the new fittings onto the water supply valves by hand to avoid cross-threading, then snug them down an additional quarter-turn with adjustable pliers.
- Turn the water supply valves back on slowly and check for moisture around the threaded connections using a dry paper towel. If you notice unusual shaking or motor noises during your first cycle, check our guide on washer and dryer repair services to troubleshoot internal pump or suspension issues.
2. Clear Hidden Dryer Vent Lint and Ducts
Unplug an electric dryer or shut off the gas valve before pulling the unit away from the wall. Previous owners frequently empty the slide-out lint screen but neglect the internal blower housing and exterior exhaust duct, creating a severe fire hazard and restricting airflow.
- Loosen the circular metal clamp securing the exhaust transition duct to the back of the dryer drum.
- Inspect the duct material; replace flexible plastic or thin foil accordion tubing with rigid or semi-rigid metal ducting compliant with building fire codes.
- Insert a narrow vacuum crevice attachment deep into the lint trap cavity beneath the screen to lift compacted felt-like fuzz.
- Take a 20-foot rotary dryer vent brush kit attached to a cordless drill and run it through the exterior exhaust hood outside your house to dislodge clogs.
- Reattach the duct firmly using metal foil HVAC tape rather than standard duct tape, which deteriorates under high exhaust heat.
3. Deep-Clean the Dishwasher Filter and Sump
Cut power to the dishwasher at your home breaker box before reaching into the lower wash tub. Inherited dishwashers frequently harbor rotting food scraps, calcified hard water scale, and greasy slime in the fine filter mesh, resulting in cloudy glassware and foul kitchen odors.
- Slide out the bottom dish rack and inspect the spray arm nozzles for blocked spray holes using a wooden toothpick.
- Locate the cylindrical filter assembly at the base of the tub, twist it counter-clockwise, and lift the assembly straight up.
- Remove the flat stainless steel micro-mesh plate resting beneath the cylinder.
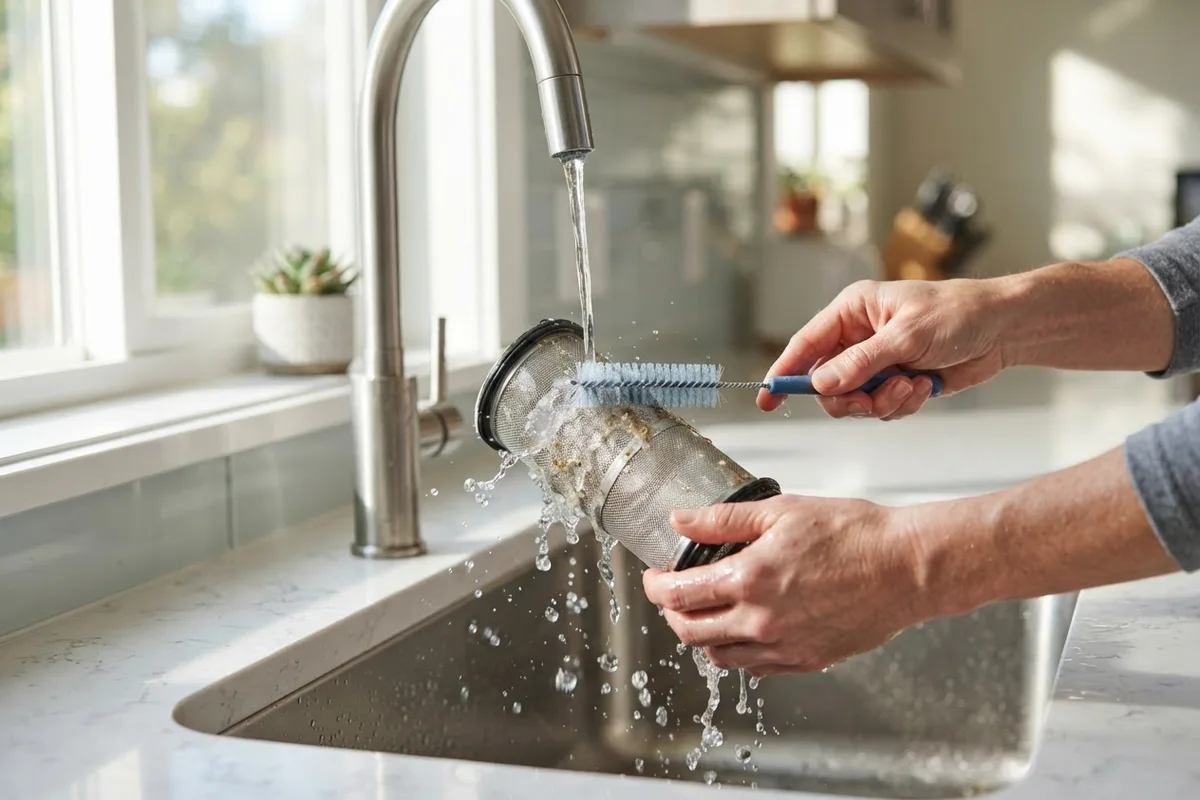
- Take the filter components to your kitchen sink and scrub the mesh thoroughly using warm water, liquid dish soap, and a soft nylon brush.
- Inspect the exposed sump pit for broken glass, twist ties, or melon seeds that could bind the drain impeller. If water remains sitting in the tub after cleaning, or if your dishwasher won't turn off, an obstructed drain valve or stuck float assembly may require attention.
4. Vacuum Refrigerator Coils and Check Seals
Unplug the refrigerator from the wall outlet before cleaning around electrical components or condenser fans. Heavy carpets of dust, lint, and pet dander insulate condenser coils, trapping heat and forcing the compressor to work twice as hard to maintain cold temperatures.
- Locate the condenser coils, which sit behind the lower front kick-plate grille or across the bottom rear of the cabinet.
- Snap off the front grille and insert a specialized long-reach coil brush between the metal serpentine tubing to loosen packed lint.
- Vacuum the dislodged debris using a shop vac or narrow vacuum attachment, taking care not to bend cooling fins or disconnect fan wiring.
- Test the flexible magnetic door gaskets using the dollar-bill method: insert a bill between the rubber gasket and the metal door frame, then close the door.
- Pull the bill outward; if it slides out freely without resistance, the seal is weak and letting warm air inside, which accelerates frost buildup. For persistent ice buildup, review our troubleshooting steps on why is my freezer burning food.
5. Deodorize and Clear the Garbage Disposal
Always shut off the wall switch and trip the dedicated disposal breaker before inspecting the grinding chamber. Never place your fingers or hands directly inside the disposal hopper under any circumstances.
- Pull out the removable rubber splash baffle from the sink drain opening and scrub its underside with hot water and baking soda to remove built-up black sludge.
- Shine a bright flashlight into the chamber to confirm that no foreign metal objects, bottle caps, or fibrous plant matter are wedged between the impellers.
- Pour two cups of ice cubes and one cup of coarse rock salt into the grind chamber to scour mineral deposits from the shredder ring.
- Turn on cold tap water, flip the wall switch, and run the disposal for 30 seconds until the ice is completely crushed.
- Finish by feeding fresh lemon or orange wedges down the drain to neutralize sour odors. If waste water backs up into the sink basin during testing, consult our breakdown on why is garbage disposal draining slow to clear the P-trap.
6. Check Oven Temperature Calibration
Before running any calibration tests, make sure all burners are switched off and the oven cavity is completely empty of pans, foil, and baking stones. Inherited ovens often wander 25 to 50 degrees away from their factory settings, resulting in underbaked centers and burned crusts.
- Place an analog oven thermometer in the center of the middle baking rack where air circulates freely.
- Close the oven door and set the control panel to bake at 350°F (177°C).
- Allow the oven to preheat completely, waiting an additional 15 minutes after the preheat chime sounds to allow chamber heat to stabilize.
- Look through the door glass to read the thermometer without opening the door, recording the temperature every 10 minutes across three heating cycles.
- Average the three readings; if the average deviates by more than 15 degrees from 350°F, access your model's calibration menu (usually accessed by pressing and holding the Bake button for five seconds) to enter a positive or negative temperature offset.
7. Map Water Shutoff Valves and Circuit Breakers
Familiarizing yourself with emergency shutoff points is the single most important safety action a new homeowner can take. When an appliance component fails or a supply line ruptures, every second counts to prevent catastrophic structural flooding.
- Locate the main electrical breaker panel and verify that kitchen counter circuits, the refrigerator, range, dishwasher, and laundry pair are clearly labeled.
- Find the individual quarter-turn brass ball valve for the dishwasher water line, typically positioned beneath the kitchen sink.
- Check the small shutoff valve feeding the refrigerator ice maker, often found behind the lower cabinet baseboards or in the basement ceiling below the kitchen.
- Exercise each shutoff handle gently by turning it 90 degrees to ensure mineral buildup has not seized the valve stem.
- Locate the main emergency water shutoff valve for the entire house and confirm every family member knows how to operate it in an emergency.
| Appliance | Move-In Priority | Key Inspection Step | Recommended Action |
|---|---|---|---|
| Washing Machine | High | Check rubber fill hoses for cracks | Upgrade to braided stainless steel |
| Clothes Dryer | High | Inspect rear exhaust transition duct | Clear lint build-up; install rigid metal duct |
| Dishwasher | Medium | Remove and clean base tub filter | Scrub screen; inspect drain sump pit |
| Refrigerator | Medium | Inspect condenser coils and door seals | Vacuum coils; run dollar-bill gasket test |
| Garbage Disposal | Medium | Inspect splash baffle and impellers | Scour with rock salt and ice cubes |
| Range / Oven | Low | Check baking temperature accuracy | Calibrate control board offset if off by 15°F+ |
| Plumbing Shutoffs | Critical | Verify operation of supply valves | Exercise valves to prevent mineral seizure |
When to Call a Pro
DIY maintenance handles routine cleaning, filter changes, and external hose replacements safely. However, you should stop immediately and call a qualified technician whenever dealing with natural gas supply lines, internal electrical wiring behind control panels, or sealed refrigerant systems. If you smell gas, hear electrical buzzing inside a cabinet, or find standing water underneath built-in cabinetry, turn off the utility source and consult an expert. Typical professional diagnostic and service calls range between $120 and $350, though exact pricing varies by area and appliance model. When an inherited machine requires in-depth component diagnosis, True Appliance Repair can match you with an independent local appliance pro to get your home running smoothly.
FAQ
How soon after moving in should I complete this appliance checklist?
You should complete safety checks—such as replacing rubber washer hoses, clearing the dryer vent, and locating emergency shutoff valves—within your first 48 hours in the home. Deep-cleaning dishwasher filters, vacuuming refrigerator condenser coils, and calibrating oven temperatures can follow over your first two weeks before heavy entertaining or holiday cooking begins.
Why does my inherited washing machine or dishwasher smell musty?
Musty odors stem from accumulated detergent scum, fabric softener oils, and standing gray water trapped in filters, door gaskets, and drain sumps by previous occupants. Running an empty sanitizing wash cycle with two cups of distilled white vinegar or an oxygenated appliance cleaner dissolves built-up biofilm and restores a neutral scent.
Do I really need to replace rubber washer hoses if they look fine?
Yes, rubber washing machine hoses deteriorate from the inside out due to constant municipal water pressure and temperature fluctuations. Microscopic fissures form within the internal rubber lining long before external bulging or cracks appear, making preventative replacement with braided stainless steel lines standard practice for new homeowners.
Can cleaning refrigerator coils actually lower my electric bill?
Yes, cleaning heavily fouled refrigerator condenser coils can improve compressor efficiency noticeably. When coils are caked with dirt, the compressor runs longer and hotter to shed heat, consuming excess electricity and shortening the overall operating life of your cooling system.