
Neglecting routine appliance care often leads to sudden breakdowns, inflated utility bills, and inconvenient emergency repairs right when you need your home running smoothly. Performing seasonal appliance maintenance helps keep your heavy-use units operating efficiently through every summer heatwave and winter freeze. This straightforward checklist breaks down essential maintenance tasks across your kitchen and laundry room into easy, step-by-step DIY steps.
Before starting any hands-on inspection or maintenance work, prioritize safety: always unplug the appliance from the wall outlet and shut off the dedicated water valve or gas supply line. If you ever detect gas odors, electrical burning smells, or sealed refrigerant leaks, stop immediately and contact a qualified technician.
Clean Refrigerator Coils to Protect the Compressor
Dust, pet hair, and lint accumulate on your refrigerator's condenser coils over time, forcing the compressor to work twice as hard to keep internal temperatures cool. Overheated compressors consume significantly more energy and face premature hardware failure.
- Unplug the refrigerator and slide it carefully away from the wall to access the back panel or remove the toe kick plate at the front bottom.
- Locate the coiled metal tubes (condenser coils).
- Use a narrow appliance coil brush to gently loosen caked-on dust and debris between the coils.
- Vacuum up loose dirt using a narrow hose attachment or shop vacuum.
- Reattach the panel, slide the unit back into place ensuring lines aren't pinched, and plug it in.
Performing this step twice a year drastically improves efficiency. If you notice your unit still struggles to hold cold temperatures after cleaning, review our guide on why is my refrigerator leaking water or check for underlying cooling issues.
Flush the Water Heater to Remove Sediment Build-Up
Naturally occurring minerals like calcium and magnesium settle at the bottom of your water heater tank as sediment. Over time, this layer insulates the heating element from the water, causing popping noises, reduced hot water volume, and localized corrosion.
- Turn off power to an electric water heater at the main breaker, or set a gas unit's thermostat knob to 'Pilot'.
- Shut off the cold water inlet valve at the top of the heater.
- Attach a standard garden hose to the drain valve located near the bottom of the tank, placing the opposite end in a floor drain or outside.
- Open a hot water faucet upstairs to relieve system vacuum pressure.
- Open the drain valve carefully and allow a few gallons of sediment-laden water to flow until it runs clear.
- Close the drain valve, disconnect the hose, reopen the cold inlet valve, let the tank fill completely, and restore power or gas.
Clear the Dryer Vent Line to Prevent Fire Hazards
Lint slips past the internal trap filter during every drying cycle and accumulates inside the exhaust ductwork. Restricting exhaust airflow traps moisture inside the drum, drastically prolonging dry times and creating serious heat risks.
- Pull the dryer away from the wall, unplug the power cord, and disconnect the flexible exhaust duct from the wall vent.
- Insert a flexible vent cleaning brush attached to a drill extension rod into the ductwork, rotating it gently to dislodge packed lint.
- Vacuum out all dislodged lint from inside the wall pipe and the back cabinet duct of the dryer.
- Reattach the exhaust pipe securely with metal duct tape or clamp rings—never use duct tape, which deteriorates over time under high heat.
If your dryer continues to run hot without drying clothing efficiently after cleaning, consult our troubleshooting steps for why is my dryer not getting hot.
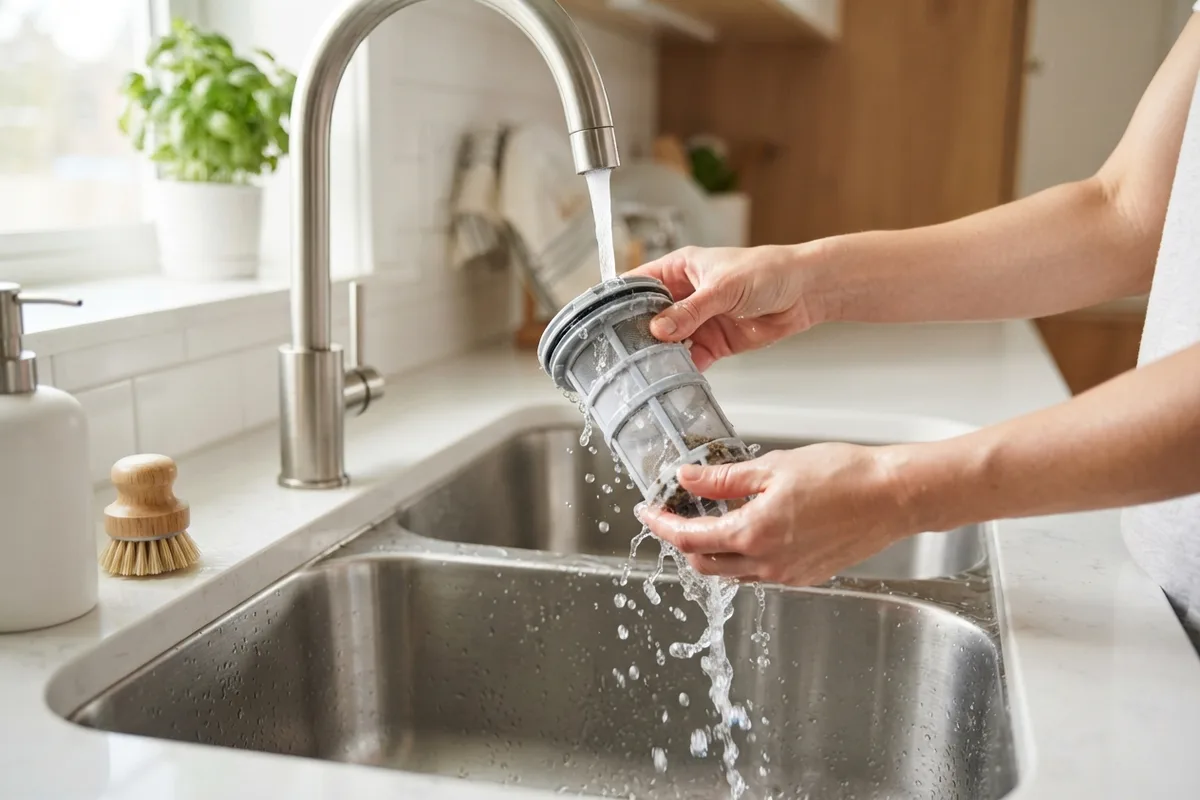
Clean the Dishwasher Filter and De-Scale the Interior
Food particles, grease, and hard water minerals settle in the fine mesh filter beneath the lower spray arm of your dishwasher. A clogged filter restricts water circulation, leaving cloudy spots on glassware and foul odors inside the tub.
- Pull out the lower rack and twist the cylindrical mesh filter counterclockwise to remove it.
- Rinse the filter under warm running water, scrubbing gently with a soft nylon brush and dish soap to remove greasy sludge.
- Wipe out the sump area beneath the filter housing with a microfiber cloth.
- Place a dishwasher-safe cup filled with two cups of white distilled vinegar on the top rack of an empty machine, and run a heavy hot-water cycle to dissolve limescale.
Inspect Washing Machine Hoses for Cracks and Bulges
High-pressure rubber water inlet hoses on washing machines age, stiffen, and deteriorate over time. A ruptured supply hose can discharge hundreds of gallons of water in a short time, leading to severe home structural damage.
- Slide the washer forward and turn off both the hot and cold water shut-off valves behind the machine.
- Visually inspect the rubber hoses for surface cracks, small blisters, rusty fittings, or soft spots along the line.
- Unthread the hose connections using slip-joint pliers, catching residual water in a shallow bucket.
- Clean the tiny sediment screen filters sitting inside the washer's water inlet valve connections.
- Replace traditional rubber hoses every three to five years with reinforced stainless-steel braided fill hoses for superior burst protection.
For additional appliance longevity tips, read our checklist on 7 signs your washing machine is dying.
Clean the Garbage Disposal Baffle and Drain Line
Garbage disposals frequently harbor decaying food waste beneath the rubber splash guard and along the upper grind chamber wall, resulting in persistent kitchen odors and sluggish draining.
- Turn off the disposal's dedicated wall switch and flip the breaker in your main panel to prevent accidental activation.
- Scrub the underside of the rubber splash guard using an old toothbrush dipped in a paste of baking soda and liquid dish soap.
- Shine a flashlight down into the chamber to ensure no metal objects or dense fruit pits are lodged near the impellers.
- Restore power, turn on cold water at high flow, and drop two cups of ice cubes alongside half a cup of coarse rock salt down the disposal.
- Run the disposal for 30 seconds to scrape grease buildup off the internal grind ring.
- Flush with cold water and citrus peels to leave a fresh odor.
Degrease Range Hood Filters and Check Oven Gaskets
Grease-laden cooktop exhaust filters reduce airflow, leaving airborne cooking oils to settle on your cabinets and walls. Meanwhile, worn oven door gaskets allow heat to leak during baking, causing uneven cooking and excess energy draw.
- Slide the mesh aluminum range hood filters out of their housing frames.
- Submerge the filters in a sink filled with boiling water, half a cup of baking soda, and a squirt of grease-cutting dish soap for 15 minutes.
- Scrub gently with a scrub sponge, rinse thoroughly with clean hot water, and dry completely before re-installing. If you need a comprehensive guide for deep cleaning your stove, read our guide on how to clean an oven.
- Inspect the flexible woven rubber or fiberglass seal around your oven door frame. Look for tears, brittle sections, or gaps that let heat escape.
| Appliance | Essential Maintenance Task | Recommended Frequency | Typical DIY Time |
|---|---|---|---|
| Refrigerator | Vacuum condenser coils & clean door gaskets | Every 6 months | 20 minutes |
| Water Heater | Flush bottom sediment & check T&P valve | Annually | 30 minutes |
| Clothes Dryer | Clean internal ductwork & outdoor vent hood | Every 6–12 months | 45 minutes |
| Dishwasher | Wash lower mesh filter & run vinegar cycle | Monthly | 10 minutes |
| Washing Machine | Inspect inlet hoses & clean coin trap filter | Every 3–6 months | 15 minutes |
| Garbage Disposal | Scrub splash guard & grind ice with salt | Monthly | 10 minutes |
When to Call a Pro
While surface cleaning, filter replacements, and simple hose inspections are ideal DIY weekend tasks, certain home appliance problems require specialized tools and expert training. Attempting complex structural or electrical work without experience risks severe injury or further equipment damage.
Stop and contact a technician immediately if you encounter:
- Gas smells or leaking fuel supply connections on ranges or dryers.
- Sealed system cooling faults, such as refrigerant leaks or failed compressor valves.
- High-voltage electrical issues, buzzing control panels, or blown thermal fuses that repeatedly trip your circuit breaker.
- Internal transmission or tub bearing failures on laundry machines.
When a maintenance issue goes beyond safe DIY remedies, True Appliance Repair can match you with an independent local pro to diagnose and repair your equipment quickly.
FAQ
How often should seasonal appliance maintenance be done?
Most major household appliances benefit from bi-annual checkups in spring and autumn. However, high-use items like dishwasher filters, garbage disposals, and dryer lint traps need monthly attention to maintain peak performance and hygiene.
Can routine maintenance really lower energy bills?
Yes. When condenser coils, dryer vents, and water heating elements are clean and free of buildup, motors and heating elements operate at peak efficiency. This reduces electricity and gas consumption while extending the operational lifespan of your units.
What safety steps are required before cleaning appliances?
Always disconnect the appliance from its electrical power source by pulling the plug or shutting off the circuit breaker. Turn off water shut-off valves for wet appliances like washers and dishwashers, and turn off gas supply shutoff valves for gas ranges or dryers before touching any mechanical components.
How much does professional appliance maintenance cost?
Professional preventative maintenance visits typically cost between $100 and $250, depending on your geographic area, the number of appliances inspected, and specific model requirements. Comprehensive multi-appliance tune-ups often cost less per unit than single emergency repair visits.