
Nothing stalls dinner preparation faster than turning on the range and realizing one of your electric stove burners is staying ice cold while the rest of the stovetop heats up normally. Before you resign yourself to cooking every meal on a single back burner, take heart: most single-burner failures come down to a loose connection, a worn plug receptacle, or a simple part you can swap out yourself in under thirty minutes. Follow these six safe, step-by-step checks to pinpoint the exact culprit and get your stove cooking evenly again.
Safety First: Before touching any burner coils, drip pans, or internal stove panels, always turn all control knobs to the "Off" position, make sure the stovetop is completely cool, and unplug the range from the wall outlet (or flip the double-pole range circuit breaker to "Off" at your home's main electrical panel). Never attempt live electrical testing or main breaker panel work yourself.
1. Check the Circuit Breaker and Power Supply
It sounds odd, but an electric range can sometimes turn on its clock and display lights while failing to heat any burners at all. Electric stoves run on 240-volt power, which uses two separate 120-volt hot legs paired together in a double-pole breaker. If one half of that breaker trips, your digital clock and oven light (which only need 120 volts) will keep working, while the heating elements stay completely dead.
- Walk over to your home's main electrical breaker box and locate the wide double breaker labeled "Range" or "Stove."
- Look closely at the switch handle. Even if it looks mostly aligned, one side of the linked breaker may have tripped internally.
- Flip the entire double breaker firmly to the full "Off" position, wait ten seconds, and flip it back to "On."
- Return to the kitchen and test a burner for sixty seconds. If the breaker trips again right away, stop immediately and call an electrician or appliance technician.
2. Reseat and Swap the Coil Burner Element
If only one coil burner refuses to heat up, the simplest explanation is a loose plug connection. Every time you lift a pot, scrub boil-overs, or remove the drip pans for cleaning, the metal prongs at the end of the heating coil can wiggle slightly out of their socket. Swapping the cold burner with a working one is the fastest diagnostic trick in the book.
- Make sure the stove is cool and turned off, then unplug the range or shut off the breaker.
- Grasp the non-working coil burner opposite the terminal block, lift it up about an inch, and pull the two metal prongs straight out of the receptacle.
- Inspect the coil surface for blisters, cracks, or tiny burn holes, and wipe the two metal prongs clean with a dry cloth.
- Plug a known working coil of the exact same size into the problem socket, or plug the suspect coil into a working socket.
- Restore power and test briefly. If the suspect coil stays cold in a working socket, you simply need a replacement burner element—which typically costs $20 to $50 (varies by area and model).
3. Inspect and Clean the Burner Receptacle
If a known good coil still fails to heat when plugged into a specific spot on your stovetop, the problem is almost certainly the ceramic or plastic burner receptacle (also called the terminal block) tucked under the drip pan. Because this socket endures extreme heat cycling and greasy spills, the internal metal spring clips frequently oxidize, lose tension, or burn out over time.
- Shut off power at the breaker and remove the coil element and chrome or porcelain drip pan.
- Shine a flashlight directly into the two slots of the receptacle block.
- Look for black char marks, melted plastic, greenish corrosion, or widened metal clips that no longer grip the burner prongs tightly.
- If the contacts only have light food residue or mild oxidation, gently scrub inside the slots using a small strip of fine-grit sandpaper wrapped around a wooden toothpick, then vacuum away any dust.
- If you see burnt, pitted metal or charred wiring attached to the back of the block, do not reuse it—the receptacle kit must be replaced.
4. Test the Element With a Multimeter
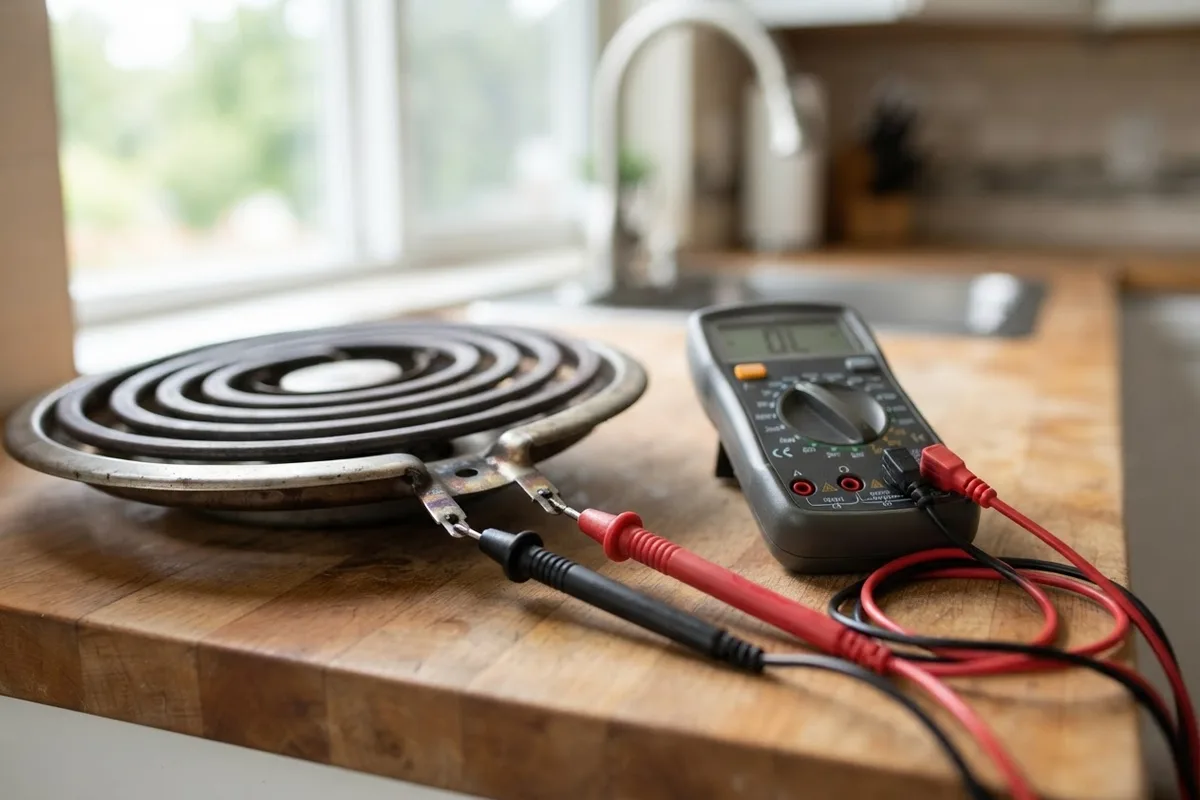
When you have a radiant glass-top stove—or when all your similar-sized coil burners are acting up—you cannot just swap coils around to test them. Instead, you can verify whether a heating element has an unbroken electrical path by checking it for continuity with an inexpensive digital multimeter. If your stovetop is also producing strange odors or haze during use, check out our guide on why an oven smokes when empty to rule out spilled grease in the vents.
- Unplug the stove from the wall and remove the burner coil, or lift the glass cooktop panel according to your owner's manual to access the radiant element terminals.
- Set your multimeter dial to the lowest Ohms (Ω) resistance setting.
- Touch one metal meter probe to each of the two main heating terminals on the burner element.
- Read the display. A healthy electric stove burner typically reads between 15 and 60 ohms of resistance, depending on its wattage size.
- If the meter reads "OL" (open loop) or infinity, the internal heating wire has snapped and the element needs to be replaced.
5. Check Under-Cooktop Wiring for Burn Marks
High amperage flows through the wires underneath your cooktop every time you boil water or sear food. Over years of holiday feasts and daily dinners, the insulated wires leading from the burner receptacle to the back control panel can bake, turn brittle, and burn right off their spade connectors. Checking these wires is part of smart appliance energy saving tips and maintenance that prevent bigger breakdowns.
- With the range completely unplugged, remove all coil burners and drip pans.
- Lift the hinged main stovetop lid (most coil stoves prop up like a car hood with a support rod) to expose the wiring harness underneath.
- Follow the two wires leading out of the back of the dead burner's receptacle block.
- Look for crispy, blackened insulation, loose push-on terminals, or wires that have detached completely.
- If a wire end is burned, a repair pro will need to trim back the damaged wire to clean copper and crimp on a specialized high-temperature ceramic or nickel-plated terminal.
6. Diagnose a Faulty Infinite Control Switch
What if the coil is good, the receptacle is spotless, and the under-top wires look pristine, yet the burner still will not heat? The culprit is likely the infinite control switch—the square rotary switch mounted directly behind the stove knob on the backsplashes or front console. Inside this switch, tiny bi-metal contacts open and close to regulate heat from simmer to boil. When those contacts weld shut or snap, power never reaches the burner.
- Keep the stove unplugged and pull the plastic control knob straight off the shaft of the non-working burner.
- Unscrew the rear access panel behind the console (or the front manifold panel on slide-in ranges) to view the back of the switches.
- Inspect the switch body for dark soot trails, melted plastic around the spade terminals, or a burnt electrical smell.
- Notice how the knob feels when you turn the metal shaft by hand—if it spins loosely without clean clicks at the "Off" position, the internal cam is broken.
- Because infinite switches carry 240 volts and have model-specific terminal layouts, replacing one requires photographing every wire position carefully or handing the job to an experienced technician.
Quick Troubleshooting & Cost Guide
Note: All price ranges below are typical US estimates and vary by area, range brand, and whether you install the part yourself or hire a technician.
| Symptom | Most Likely Cause | Typical DIY Part Cost | Typical Pro Repair Cost |
|---|---|---|---|
| All burners cold, clock still works | Tripped half of 240V breaker | $0 (Reset breaker) | $100 – $200 (If outlet/cord issue) |
| Single coil cold, works when swapped | Bad coil burner element | $20 – $55 | $110 – $190 |
| Good coil won't heat in one socket | Burned burner receptacle block | $15 – $35 | $120 – $210 |
| Burner sparks at plug or works if wiggled | Loose receptacle clips / burnt wire | $15 – $40 | $130 – $220 |
| Glass-top radiant zone stays completely cold | Failed radiant element or limiter | $80 – $180 | $200 – $350 |
| Burner stays dead or only runs on high | Faulty infinite control switch | $35 – $85 | $150 – $275 |
When to Call a Pro
Swapping out a plug-in coil burner or tightening a drip pan setup is an easy Saturday morning win for any homeowner. However, if lifting the cooktop reveals melted wire harnesses, scorched terminal blocks, a dead radiant element under a heavy ceramic glass top, or a faulty 240-volt infinite control switch, it is safest to close the panel and bring in a specialist. High-voltage stove wiring requires high-temperature rated connectors and proper multimeter diagnostics to avoid fire hazards. If your oven is also acting up alongside your stovetop, you might also want to review why an oven bakes unevenly before scheduling service.
When a simple coil swap does not solve the problem, True Appliance Repair can match you with an independent local pro for reliable oven and stove repair so you can get back to cooking safely.
FAQ
Why are none of my electric stove burners working, even though the clock is on?
Your electric range runs on two 120-volt power legs that combine for 240 volts. The digital clock, timer, and oven light only require one 120-volt leg to operate, while the heating elements require the full 240 volts. Resetting your range's double-pole circuit breaker at the main panel usually restores the lost leg of power.
Can I still use the other burners if one electric burner is not working?
If the burner is simply unplugged or has an internally broken heating coil, you can safely remove the bad coil and use the remaining burners temporarily. However, if the burner socket looks charred, smells like burning plastic, or sparks when turned on, leave the entire stove unplugged until the damaged wiring is repaired.
How long do electric stove coil burners typically last?
Standard electric coil elements last anywhere from 5 to 10 years under normal household cooking conditions. You can extend their lifespan by wiping up sugary or acidic spills promptly, avoiding dropping heavy cast-iron skillets onto the coils, and never wrapping aluminum foil over the drip pans, which traps excessive heat.
Why does my electric burner only heat on high and not on low or medium?
When an electric burner goes straight to scorching hot regardless of where you set the dial, the heating coil itself is fine, but the infinite control switch behind the knob has failed. The internal bi-metal contacts inside the switch have stuck together, sending continuous 240-volt power to the burner until you turn the knob off.