
Stepping into the laundry room to find a growing puddle of water under your washer is every homeowner's headache. Fortunately, a washing machine leaking from the bottom is usually caused by a loose hose connection, a clogged filter, or simple detergent buildup rather than a cracked tub. With a towel, a flashlight, and a few basic tools, you can track down the exact source of the drip and stop the leak before it ruins your flooring.
Safety First: Before inspecting underneath or behind your washing machine, always unplug the power cord from the wall outlet—or flip the circuit breaker if the outlet is wet or hard to reach—and turn both the hot and cold water shutoff valves completely clockwise. Never stand in water while touching a plugged-in appliance.
1. Clear the Front-Load Drain Pump Filter
On front-load washers, the number one culprit behind water pooling under the front edge is a loose or clogged drain pump filter. This small access trap sits behind a little door at the lower front corner of the machine and catches coins, hairpins, lint, and buttons before they can ruin the pump. If the cap isn't threaded in straight, or if debris works its way under the rubber O-ring, water will steadily seep out across the floor during the drain and spin cycles.
- Unplug the washer and locate the small rectangular or round access panel on the bottom front apron.
- Place a shallow baking sheet or rimmed tray and two thick bath towels right beneath the panel.
- Pop the cover open using a flathead screwdriver or your fingers. If your model has a small black drain hose tucked inside, pull it out, uncap it, and let the trapped water drain into your tray.
- Slowly twist the large filter cap counterclockwise and pull it straight out.
- Remove any tangled lint, socks, or pocket change, and rinse the filter screen under warm tap water.
- Wipe the rubber O-ring on the cap and inspect it for cracks or flat spots. Thread the cap back in clockwise until it stops firmly.
If clearing this trap also releases trapped stagnant water, you may notice a sour odor; check out our guide on fixing a smelly washing machine to sanitize the drum afterward.
2. Tighten or Replace the Water Inlet Hoses
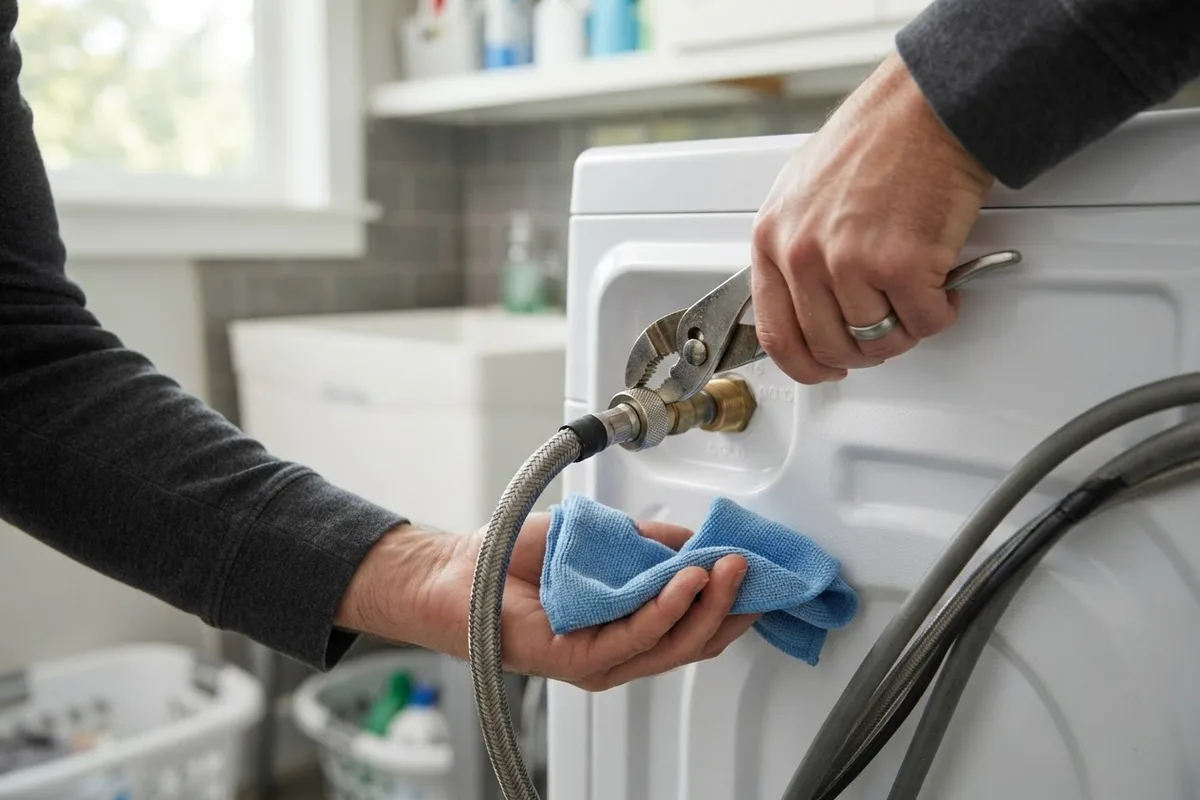
When clean water pools toward the back of the machine—even when the washer is turned off—the hot and cold fill hoses are the prime suspects. Over years of water pressure surges and spin-cycle vibrations, the brass couplings can loosen slightly, or the small rubber washers inside the hose ends can flatten out, dry up, and crack. Because water runs down the back cabinet panel and drips off the bottom frame, a back-panel hose leak frequently disguises itself as a bottom leak.
- Turn off both the hot and cold wall faucets behind the washer.
- Pull the machine forward gently so you have room to work without kinking the hoses.
- Run a dry paper towel over both the wall connections and the inlet valve connections on the back of the washer. Even a tiny drip will immediately darken the paper towel.
- If a fitting is damp, try tightening the coupling nut a quarter turn clockwise with slip-joint pliers. Do not overtighten, as the inlet threads on the washer are plastic and can strip.
- If the leak continues, unscrew the hose over a bucket, pry out the old black rubber washer inside the fitting, and press in a fresh 3/4-inch hose washer (usually under $3 for a pack at any hardware store).
- If you see blisters, rust on braided steel, or cracks along the rubber hose itself, replace both hoses with braided stainless-steel supply lines (typically $20 to $35 for the pair).
3. Inspect the Drain Hose and Standpipe Connection
If your washer only leaks right when it pumps dirty water out at the end of the wash or rinse cycle, look closely at the corrugated plastic drain hose at the back of the cabinet. This hose takes a beating from hot, sudsy water and high-speed vibration. It can chafe against the sharp metal edge of the cabinet, develop pinhole cracks in the corrugated folds, or back up out of the wall standpipe if it is pushed in too far or clogged with lint.
- Inspect the U-shaped bend where the drain hose hooks into the wall standpipe or laundry tub. Make sure the hose goes no more than 4 to 6 inches down into the pipe, and isn't sealed airtight with duct tape (which causes siphoning and backups).
- Check the lower point where the drain hose exits the back of the washer cabinet. Look for wet lint tracks or mineral crust.
- Feel along every ridge of the hose with a dry cloth while running a quick drain cycle (keep hands clear of moving parts).
- If the clamp holding the hose to the rear pump port is loose, pinch the spring clamp with pliers or tighten the worm-gear screw with a screwdriver.
- If the corrugated plastic is split, order a replacement drain hose for your model (usually $15 to $40) and swap it out.
If you discover the pump is struggling to push water through the line at all, you may also experience a washing machine not Spinning properly because the safety switch blocks high-speed spin when water remains in the drum.
4. Check the Front Door Boot Seal for Hidden Tears
On front-loading washers, the wide gray rubber bellows (called the door boot seal) forms a watertight bridge between the stationary outer door frame and the spinning wash tub. While spillsdown the front of the machine are obvious, a tear or puncture in the bottom fold of the boot seal behaves differently: water leaks inside the cabinet behind the front metal panel and drips straight out the bottom frame onto the floor.
- Open the washer door wide and shine a bright flashlight into the deep rubber folds along the bottom half of the gasket.
- Gently peel back the rubber lip to uncover the hidden drainage holes and check for bobby pins, drywall screws, or underwire bra pieces that may have poked through the rubber.
- Wipe away crusty detergent buildup and pet hair from the inner glass of the door and the face of the rubber lip. Even a clump of hair stuck to the glass can create a tiny channel where water trickles down inside the door frame.
- Check the spring-loaded wire clamp holding the outer edge of the boot to the front metal panel to make sure it hasn't slipped out of its groove.
- Small tears sometimes temporarily hold with waterproof silicone adhesive, but for a lasting fix, replacing the door boot seal ($60 to $140 for the part, depending on the brand) is the reliable choice.
5. Stop Oversudsing From the Overflow Tube
Sometimes nothing is broken at all—your washer is simply choking on too much foam. High-efficiency (HE) washers use a fraction of the water that older top-loaders used. If you use regular non-HE detergent, pour in double the recommended dose, or wash heavily softened water loads without cutting back on soap, thick foam rises up the internal overflow tube or vents out the rear air dome. Once those suds condense back into liquid, they run down the inside of the cabinet and form a slick, soapy puddle under the bottom of the machine.
- Touch the water on the floor. If it feels noticeably slippery, slimy, or smells strongly of laundry soap, oversudsing is a very likely cause.
- Wipe the floor dry and run an empty Rinse and Spin cycle with cold water (no detergent) to see if suds immediately billow up inside the drum.
- Pour half a cup of plain white vinegar into the drum or detergent drawer and run a hot wash cycle to break down leftover soap scum coating the outer tub and hoses.
- Switch strictly to HE-formulated detergent and use no more than one to two tablespoons per regular load.
- Slide out the detergent dispenser drawer, scrub away gummy buildup under warm water with an old toothbrush, and wipe the housing cavity dry so incoming water doesn't deflect and run down the inside of the front panel.
6. Inspect the Internal Water Pump and Tub Hoses
When all external hoses, filters, and seals are bone dry, the leak is coming from inside the lower cabinet. Both top-load and front-load washers rely on a water pump and thick black rubber hoses connecting the outer wash tub to the pump housing. Over years of exposure to bleach, zippers, and heavy vibration, the plastic pump housing can develop a hairline crack, the internal pump seal can wear out, or a rubber tub-to-pump hose can rub against the steel frame until it leaks.
- Unplug the washer completely and shut off both water valves.
- Depending on your washer's design, remove the rear access panel or the lower front service panel (usually held by two to four hex-head screws).
- Shine a flashlight onto the floor pan of the washer and look for chalky white detergent trails, rust spots, or standing water directly beneath the water pump.
- Squeeze the thick black rubber bellows hose running between the bottom of the plastic wash tub and the pump. Check that the metal spring clamps at both ends are tight and haven't rusted through.
- Inspect the body of the drain pump itself. If water is dripping directly from the seam of the plastic pump housing or the motor shaft, the pump assembly needs to be replaced.
Quick Troubleshooting Guide: Where Is the Leak Coming From?
Use the location and look of the puddle to narrow down your inspection in seconds:
| Puddle Location & Water Type | When It Happens | Most Likely Cause | Typical DIY Part Cost (Varies by Model) |
|---|---|---|---|
| Front left or right corner (dirty or linty water) | During drain or spin cycle, or when opening trap | Loose or clogged drain pump filter cap | $0 – $25 (cleaning or new cap/O-ring) |
| Front center under the cabinet (soapy water) | During wash agitation or tumble | Torn door boot seal or hair on door glass | $0 – $140 (cleaning or new boot seal) |
| Back of the washer (clean, clear water) | Constant drip, even when washer is off | Loose inlet hose coupling or worn rubber washer | $3 – $35 (hose washers or braided hoses) |
| Back of the washer (gray, dirty water) | Only when the pump drains the tub | Split corrugated drain hose or standpipe backup | $15 – $40 (replacement drain hose) |
| Anywhere underneath (very slick, foamy water) | Mid-cycle on heavy loads | Oversudsing from non-HE or excess detergent | $0 (switch to 1–2 tbsp HE detergent) |
| Center underneath (rusty or soapy water) | During wash or drain cycle | Cracked internal drain pump or loose tub hose | $35 – $95 (replacement drain pump) |
When to Call a Pro
Tightening supply hoses, cleaning the front pump trap, and dialing back your detergent are straightforward tasks any homeowner can handle in under thirty minutes. However, if your inspection points to a cracked outer wash tub, a leaking center tub seal and worn-out main bearings (which often leave greasy brown or rust-colored puddles underneath and make a loud roaring sound during spin), or a deeply buried internal pump on a stacked laundry unit, it is best to put the tools down. Disassembling a washer drum requires heavy lifting and specialized spanner wrenches.
Professional repair for an internal pump, inlet valve assembly, or door boot seal typically runs between $150 and $350 depending on your local area and washer model—far less than the price of a new machine. You can compare typical service expenses in our appliance repair cost guide to decide your best next step. If you want an experienced technician to track down the drip and swap the worn component safely, True Appliance Repair can connect you with a local pro for washer and dryer repair.
FAQ
Is it safe to run my washing machine if it has a small leak from the bottom?
No, you should stop using the washer as soon as you spot a leak. Even a tiny trickle can quickly turn into a full tub dump of 15 to 20 gallons if a weakened hose or cracked pump housing gives out mid-cycle. Standing water under the cabinet also creates a serious shock hazard around the motor and wiring harness and can warp subfloors within hours.
Why does my washing machine only leak on large loads?
A leak that only shows up during large or heavy loads usually points to one of three things: an overloaded drum pushing wet clothes hard against the front door seal, excess suds foaming out of the rear overflow tube because of extra detergent, or the heavy tub sagging low enough on its suspension springs to stretch a worn tub-to-pump hose. Try running a medium load with one tablespoon of HE detergent to see if the floor stays dry.
How can I tell if the leak is coming from the washer or the wall drain pipe?
Dry the floor and wrap a dry paper towel around the top of the wall standpipe where the washer's drain hose hooks in, securing it loosely with painter's tape. Run a short Rinse and Spin cycle. If the paper towel at the top of the standpipe gets soaked first, your household drain line is partially clogged and backing up over the rim; if the paper towel stays dry while water appears beneath the cabinet, the leak is coming from the washer itself.
How much does it cost to fix a washing machine leaking from the bottom?
If you fix it yourself, the cost is often $0 to $40 for simple culprits like a clogged pump filter, worn rubber hose washers, or a split external drain hose. If you bring in an appliance repair technician to replace an internal drain pump, water inlet valve, or front-load door boot seal, total parts and labor typically range from $150 to $350, though exact pricing varies by region and appliance brand.