
Spring is the perfect time for a fresh start, and your home appliances deserve some attention too. After a long winter of heavy use, taking the time to inspect, clean, and tune up your appliances can significantly improve their efficiency and prevent unexpected breakdowns. This comprehensive spring appliance maintenance checklist covers seven essential DIY tasks to keep your kitchen and laundry room running smoothly.
By following these simple steps, you can save on energy bills, extend the lifespan of your household equipment, and ensure a safer home environment. Here is what you need to add to your seasonal home care to-do list this spring.
1. Clear Your Dryer Vent and Lint Trap
Dryers work overtime during the colder months, processing heavy sweaters, blankets, and coats. All of this use leads to a significant accumulation of lint, not just in your lint screen, but deep within the dryer's vent pipe. A clogged dryer vent restricts airflow, causing your dryer to run longer, use more energy, and create a serious fire hazard.
Safety First: Before you begin, unplug the dryer from the electrical outlet and shut off the gas valve if you have a gas dryer.
Numbered Steps for Maintenance:
- Clean the Lint Screen: Remove the lint screen and scrape away visible lint. To remove oily residue from dryer sheets, wash the screen with warm, soapy water and a soft brush, then let it dry completely before replacing it.
- Vacuum the Lint Trap Cavity: With the screen removed, use a long, flexible vacuum hose attachment to reach down into the lint trap cavity and suck out trapped debris.
- Disconnect the Vent Hose: Pull the dryer away from the wall and gently disconnect the vent hose from the back of the machine.
- Clean the Dryer Vent Pipe: Use a specialized dryer vent cleaning brush kit attached to a drill, or a powerful vacuum, to clean out the entire length of the vent pipe leading to the outdoors. Be sure to also clean the exterior vent cap on the outside of your home.
- Reattach and Inspect: Inspect the vent hose for any tears or damage before reattaching it. Securely clamp the hose back in place, restore the power and gas, and push the dryer back gently.
For more details on this process, see our complete guide on how to clean a dryer vent and lint trap. If you encounter any electrical faults or unusual heating issues, consider scheduling a visit from a professional washer and dryer repair service.
2. Vacuum Your Refrigerator Condenser Coils
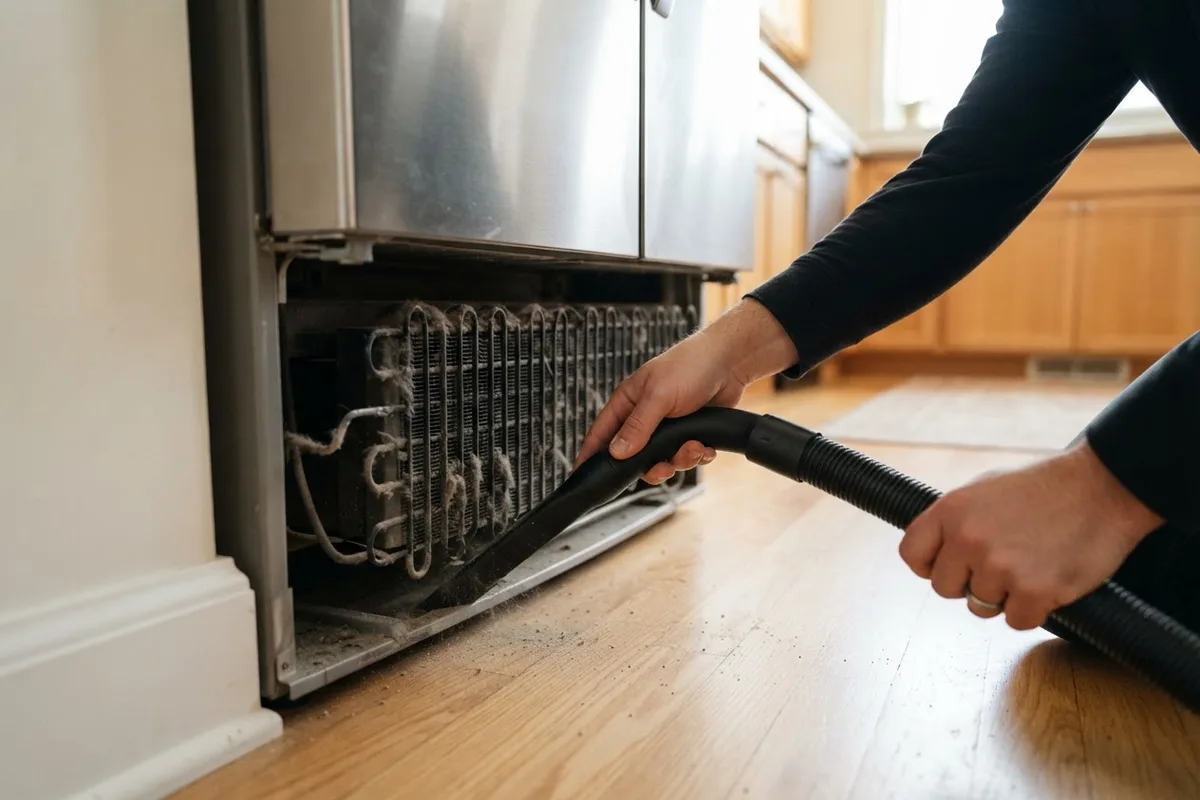
Your refrigerator is one of the hardest-working appliances in your home, running constantly to keep your food fresh. Over time, the condenser coils—usually located behind the bottom kickplate or on the back of the unit—collect dust, pet hair, and kitchen grime. When coils are caked in debris, they cannot release heat effectively. This forces your refrigerator's compressor to work harder, which drastically increases your energy bills and shortens the lifespan of the appliance.
Safety First: Always unplug your refrigerator before attempting to access or clean the condenser coils.
Numbered Steps for Maintenance:
- Locate the Coils: Depending on your model, the condenser coils will be behind a removable grille at the bottom front of the refrigerator, or on the lower back of the unit.
- Access the Coils: Gently snap off the bottom grille or pull the refrigerator away from the wall to access the back panel. Remove any screws holding the back access panel in place if necessary.
- Vacuum and Brush: Use a vacuum cleaner equipped with a narrow crevice tool or a specialized coil brush to gently remove the dust and cobwebs from the coils. Be careful not to bend or damage the coils. Work the brush between the coils and vacuum up the loosened dirt.
- Clean the Surrounding Area: Take this opportunity to vacuum the floor beneath and behind the refrigerator, as well as the fan blades if they are accessible. Good airflow is essential for a healthy compressor.
- Reassemble and Restore Power: Reattach the back panel or bottom grille, plug the refrigerator back in, and gently push it back into its space, leaving a few inches of clearance from the wall for proper ventilation.
Regularly cleaning your coils is one of the most effective ways to prevent cooling failures. Learn more about this task in our step-by-step guide on how to clean refrigerator coils. If you find that your fridge still isn't cooling properly after cleaning, it may be time to consult a refrigerator repair service.
3. Clean and Sanitize Your Dishwasher Filter
Throughout the winter, your dishwasher handles a lot of heavy, greasy loads. Over time, food particles, grease, and mineral deposits from hard water build up in the dishwasher's filter and spray arms. A clogged filter restricts water flow, reduces cleaning efficiency, and can lead to unpleasant odors and dirty dishes at the end of a cycle.
Numbered Steps for Maintenance:
- Remove the Bottom Rack: Open the dishwasher completely and pull out the bottom rack to access the bottom of the tub.
- Remove the Filter: Locate the filter assembly at the bottom of the dishwasher, usually beneath the spray arm. Most filters twist out easily. If there are multiple parts (like a mesh screen and a cylindrical filter), remove them all.
- Wash the Filter: Take the filter to the sink and rinse it under warm running water. Use a soft-bristled brush (such as an old toothbrush) and mild dish soap to gently scrub away any accumulated grime, grease, and food particles. Avoid using abrasive tools that could tear the mesh.
- Check the Spray Arms: Inspect the holes in the top and bottom spray arms. If any are clogged with mineral deposits or debris, use a toothpick or a small piece of wire to gently clear them out.
- Sanitize the Tub: Reassemble the filter and place it back into the dishwasher. To sanitize the interior, place a dishwasher-safe bowl containing one cup of distilled white vinegar on the top rack. Run a full, hot-water cycle with no other dishes or detergent. For an extra clean, you can follow this with a short cycle sprinkling a cup of baking soda across the bottom of the tub.
Taking care of your dishwasher filter helps prevent common issues, such as why your dishwasher is not heating water. If you notice major leaks or drainage failures, do not hesitate to contact a local dishwasher repair service.
4. Clean the Washing Machine Drum and Seal
Damp, dark environments are breeding grounds for mold, mildew, and bacteria. Over time, detergent residue, fabric softener, and trapped moisture in your washing machine can create foul odors and even transfer stains to your clean clothes. Your spring appliance maintenance checklist is the perfect excuse to give your washer a thorough deep clean.
Numbered Steps for Maintenance:
- Inspect and Clean the Rubber Seal (Front-Loaders): If you have a front-load washer, use a damp cloth and a mild cleaner or a mixture of equal parts water and vinegar to wipe down the rubber door gasket. Pull back the folds of the seal gently to remove trapped hair, coins, debris, and mold. Wipe it dry when finished.
- Clean the Drain Pump Filter: Most front-load and some top-load washers have a drain pump filter located behind a small access door near the bottom front of the machine. Place a towel and a shallow bowl on the floor beneath it. Open the access door, slowly unscrew the filter, and allow any trapped water to drain into the bowl. Remove the filter, wash it under warm water to clear out lint and debris, and reinsert it securely.
- Run a Hot Cleaning Cycle: Pour two cups of distilled white vinegar directly into the empty washer drum. Select the highest water temperature setting and the longest cycle (or use the "Clean Washer" cycle if your machine has one).
- Follow with Baking Soda: Once the cycle finishes, sprinkle one cup of baking soda into the drum and run another hot, empty cycle. This helps neutralize odors and break down any remaining residue.
- Wipe Down the Exterior: While the washer is running, wipe down the exterior, control panel, and the detergent dispenser drawer, which can often collect gunky buildup. Leave the washer door cracked open when not in use to allow the interior to dry completely and prevent future mold growth.
For a deeper dive into maintenance for specific washer types, read our guide on how to clean a washing machine drain pump filter to prevent leaks and drainage failures.
5. Degrease Your Oven and Inspect Door Seals
Winter holiday cooking and hearty roasting often leave behind a thick layer of grease and burnt-on food on your oven's interior walls and racks. Not only can this cause your oven to smoke and smell when you use it, but it can also affect the flavor of your food and cause uneven heating. Spring is the ideal time to degrease your oven and ensure it is in top working order.
Safety First: Unplug electric ovens or shut off the gas supply before hands-on maintenance, and ensure the oven is completely cool. Never attempt to clean around heating elements with harsh liquids.
Numbered Steps for Maintenance:
- Remove and Soak Racks: Remove all oven racks and soak them in a tub of warm, soapy water. Use a non-scratch sponge to scrub away grease and burnt residue. Rinse and dry them thoroughly.
- Apply a Natural Cleaner: Make a paste using 1/2 cup of baking soda and a few tablespoons of water. Wear gloves and spread the paste over all interior surfaces of the oven, strictly avoiding the heating elements, gas igniters, and fan vents. Let the paste sit for several hours or overnight to break down grease.
- Wipe Away and Rinse: After the paste has set, use a damp cloth to wipe away the softened grime. For stubborn spots, spray a little distilled white vinegar over the baking soda paste; it will gently foam, making it easier to wipe clean with a wet cloth. Wipe thoroughly until all baking soda residue is gone.
- Inspect the Door Seal (Gasket): Check the rubber or fiberglass seal along the edge of the oven door. Look for any cracks, tears, fraying, or brittle areas. A damaged seal allows heat to escape, forcing your oven to work harder, waste energy, and cook unevenly. Gently wipe the seal down with a damp cloth.
If you notice significant heat loss or damaged seals, it could explain why your oven is burning food on the bottom. For seal replacements or persistent thermostat issues, schedule a visit with a professional oven and stove repair service.
6. Freshen Your Garbage Disposal and Check for Leaks
Your garbage disposal likely worked hard over the holidays and winter months, processing kitchen scraps and grease. Over time, food particles cling to the blades and the grinding chamber, leading to foul odors and potential clogs. Adding the garbage disposal to your spring maintenance routine will keep it running smoothly and smelling fresh.
Safety First: Never put your hands or fingers down the garbage disposal. Always turn off the circuit breaker that controls the disposal before inspecting or working on the unit.
Numbered Steps for Maintenance:
- Inspect the Splash Guard: With the power off, check the rubber splash guard in the sink drain. Use a wet sponge and a mild dish soap to clean the underside of the flaps, which often collect bacteria and grime. If it is torn or severely deteriorated, replace it.
- Clean the Blades with Ice and Salt: To safely clean the internal blades and scrape away buildup from the grinding chamber, pour one cup of ice cubes and a 1/2 cup of rock salt (or coarse sea salt) down the disposal. Turn on the cold water and run the disposal until the ice is completely ground up. The combination of ice and salt creates a powerful abrasive effect.
- Freshen with Citrus: To eliminate any lingering smells, cut a lemon or lime into small pieces. While running cold water and the disposal, slowly drop the citrus pieces down the drain. The citrus oils will leave a fresh scent and gently clean the interior.
- Check Under the Sink for Leaks: With the disposal running and water flowing, use a flashlight to inspect the space under your sink. Look closely at the disposal body, the mounting flange, and the plumbing connections for any signs of water droplets or moisture.
If you spot moisture beneath the unit, it is important to address it quickly to prevent water damage to your cabinetry. Read our troubleshooting guide on why your garbage disposal is leaking from the bottom for step-by-step repair help.
7. Check and Replace In-Line Appliance Water Filters
Many modern refrigerators and ice makers rely on in-line water filters to ensure your family has clean, great-tasting water and ice. These filters trap contaminants, but over time they become clogged and lose their effectiveness. Clogged filters can slow down water flow from your refrigerator's dispenser, cause your ice maker to produce small or cloudy ice cubes, and even harbor bacteria. Adding a filter check to your spring appliance maintenance checklist ensures healthy water all summer long.
Numbered Steps for Maintenance:
- Locate the Filter: In most refrigerators, the water filter is located either inside the upper right corner of the fresh food compartment, or behind a base grille at the bottom front. Check your owner's manual if you are unsure.
- Check the Indicator Light: Many refrigerators have a filter status indicator light on the control panel. If the light has turned yellow or red, or if it has been more than six months since your last replacement, it is time for a new one.
- Turn Off the Water Supply (If Necessary): Some models require you to shut off the water supply valve to the refrigerator before changing the filter, while others have an automatic shut-off valve built into the filter housing. Check your manual first.
- Remove the Old Filter: Slowly twist the old filter counterclockwise (usually about a quarter turn) and gently pull it straight out. Have a towel ready underneath to catch any small drips of water.
- Install the New Filter: Remove the protective cap from the new filter. Align the new filter with the housing, push it in, and twist it clockwise until it locks into place.
- Flush the System: Once the new filter is installed, turn the water supply back on if you turned it off. Run the water dispenser for three to five minutes (or about two to three gallons) to flush out any trapped air, harmless carbon dust, and ensure the water runs completely clear before drinking.
Spring Appliance Maintenance Quick Reference
| Appliance | Maintenance Task | Recommended Frequency | Estimated DIY Time |
|---|---|---|---|
| Dryer | Clean vent pipe & lint trap | Every 6-12 months | 30 minutes |
| Refrigerator | Vacuum condenser coils | Every 6 months | 15 minutes |
| Dishwasher | Clean filter & spray arms | Monthly | 15 minutes |
| Washing Machine | Clean drum & drain filter | Every 1-3 months | 20 minutes |
| Oven | Degrease & check door seal | Every 3-6 months | 45 minutes |
| Garbage Disposal | Clean blades & check leaks | Monthly | 10 minutes |
| Water Filters | Replace in-line filters | Every 6 months | 10 minutes |
When to Call a Pro
While this spring appliance maintenance checklist is designed for DIYers, some tasks require a professional touch. Always call a pro for complex repairs involving gas lines, internal electrical wiring, sealed refrigeration systems, or your home's main electrical panel.
If during your checklist inspection you notice signs of severe wear, persistent leaks, strange noises, or if an appliance refuses to start, do not ignore these red flags. Attempting complex repairs on your own can lead to further damage or safety hazards. If you encounter a problem you cannot easily fix with these basic steps, True Appliance Repair can gently guide you in the right direction. We can softly match you with a local appliance repair pro in your area who can diagnose and resolve the issue quickly. Professional repair costs typically range from $150 to $400 depending on the specific appliance, parts needed, and your location, though final prices vary by area and model.
FAQ
What happens if I skip dryer vent cleaning?
Skipping dryer vent cleaning allows lint to accumulate in the vent pipe. This restricts airflow, making your dryer run longer, use more energy, and increase your utility bills. More importantly, built-up lint is highly flammable and is a leading cause of home fires. Cleaning your vent annually is one of the most important safety checks you can perform.
Can I use bleach to clean my washing machine instead of vinegar?
Yes, you can use one cup of liquid chlorine bleach in an empty hot cycle to sanitize your washing machine and kill mold and mildew. However, never mix bleach with vinegar or any other cleaning products, as this creates dangerous, toxic fumes. For a safer, more natural alternative, stick to distilled white vinegar and baking soda in separate cycles.
How do I know if my appliance water filter needs replacing?
Most modern refrigerators have a filter indicator light that turns from green to yellow or red when it is time for a replacement. Other signs that your filter needs attention include a noticeably slower water flow from the dispenser, ice cubes that look small, malformed, or cloudy, or a distinct drop in the taste and quality of your drinking water. Generally, filters should be changed every six months.